Virtual Machines Templates, why? Templates are a great way to achieve consistent, repeatable and fast virtual machine (VM) deployments, be it an on-premise vSphere environment or cloud based environment. Having up to date VM templates for each of the operating systems you use, is key to being able to deploy infrastructure quickly and easily across multiple platforms.
In this series of blog posts, I will be focusing on deploying virtual machine templates in vSphere, specifically vSphere 7, using a product called Packer by HashiCorp. Packer is an Infrastructure as Code tool specifically for template management.
There is so much that can be done with Packer. I aim to be able to give you enough information to be able to start your journey with Packer.

Throughout this series, I will reference two templates as examples. A Windows (Windows 2019 Core), and a Linux (CentOS 7) template to give you an idea of the differences, and will also give you a basis that you can apply to other operating systems. But to start we of course need to know how to install Packer and understand the components! Let’s get started!
Installing Packer
Firstly you are going to need to download the Packer executable from the Packer website, here. The latest version at the time of writing is 1.7.0. This is an exciting release for many reasons, but specifically that its moved over to HCL (Hashicorp Configuration Language) from JSON! This brings it closer inline with the other Hashicorp products such as Terraform which already use HCL.
You have a choice of downloads for multiple operating systems. Everything in this blog series will be done on a Windows 10 machine.

Now you need to unzip the download and copy ‘packer.exe’ to either an existing PATH directory or create a new one. For simplicity here, I have copied the executable to ‘C:\Windows\System32’.
Another option for installing on Windows is to use Chocolatey by running the following:
1choco install packer
All installation options can be found here.
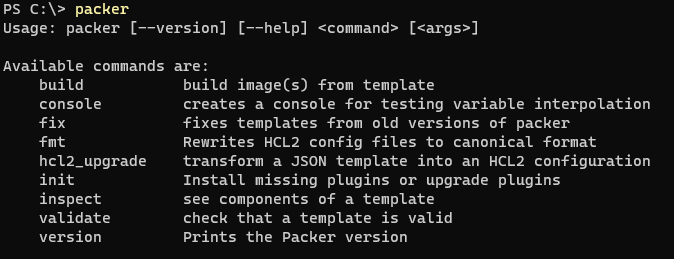
Once done, you can confirm its working by opening a PowerShell Terminal and running the Packer executable:
1packer
The Command Line
Packer has a simple command line to build your templates, you will have seen the available options when you ran ‘packer’ to check your install.
Lets take a look at a few of them that we might see during this series:
- build: Builds the template you have defined.
- fmt: This is a nice command that will format your code. Anyone who likes their code to look tidy formatting wise, will like this one!
- hcl2_upgrade: For anyone that has been using Packer with JSON configuration files, this is a great starting point to get your code converted to HCL. Be aware its not perfect in my experience and will need to be manually tweaked, but it gets you on your way.
- validate: This checks whether your template is valid. It will check to make sure your syntax is correct and has all mandatory values set for any resources you make use of.
- version: This is a quick easy way to check which version of Packer you are currently using.
As we saw above, you can find brief descriptions for the remaining options by running ‘packer’ from the command line.
Blocks
There are multiple blocks that can be used to build your virtual machine templates. You can find a complete list here, but lets take a look at some of the ones you will see throughout this series.
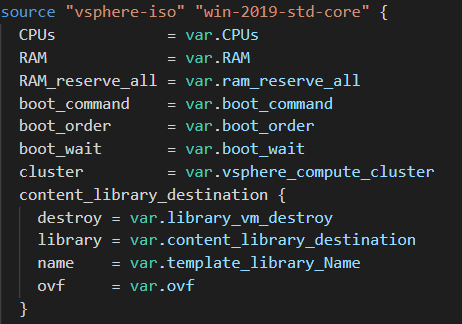
Source Blocks
There are two types of source blocks, top level that can be used and reused by multiple builder blocks, and then there are nested source blocks which can be used to inject build specific content.
Build Blocks
Build blocks are used to build your templates, in this case by referencing a source block. It can reference any top level source blocks you have referenced or source blocks nested within your build and merge them to produce a complete configuration.
Provisioner blocks and Post-Processor blocks are also referenced in the build block. More on what they do below…

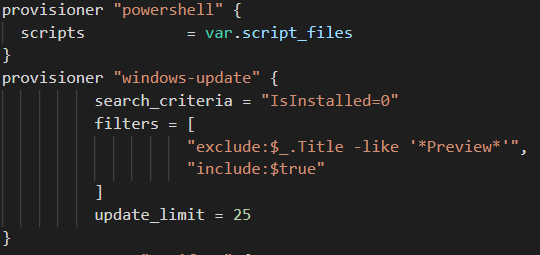
Provisioner Blocks
Provisioners are how we interface with your template once the operating system is installed. They will use either SSH or WinRM to communicate with the operating system.
We will be focusing on three provisioners throughout the series; Shell for Linux, PowerShell for Windows, and a community managed provisioner called ‘Windows Update Provisioner’.
Both PowerShell and Shell can be used to run scripts, commands, copy files (you can also use the File Provisioner to do this), install software, basically anything you want. The Windows Update provisioner, is exactly what it sounds like. It’s a way of installing the latest Windows patches. More on that later.
There are multiple HashiCorp supported provisioners available which you can find here.
Post-Processor Blocks
Finally, Post-Processors, these run once the build is complete, but its not mandatory to use them. I haven’t really used them yet apart from producing a manifest file which you will see included later in the series.
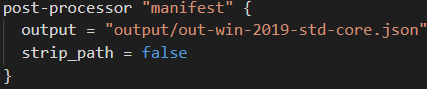
Information on the available Post-Processors can be found here.
Folder Structure, Configuration Files and Scripts
There are many ways to set out your configuration files for your templates in which ever directory structure you wish. This is the way I have found logical for me; by separating the configuration out into multiple files (mainly the 3 highlighted in Bold below), it makes it easier to reuse your code.
Folder Structure
 1\--> OperatingSystemName
 2 -->config
 3     -->answerfile.filename
 4  -->output
 5  -->scripts
 6     -->drivers
 7         -->driver.file
 8         -->driver1.file
 9     -->configurationscript1.ps1
10     -->configurationscript2.sh
11     -->install_VM_Tools.cmd
12  -->variables.pkr.hcl
13  -->build.pkr.hcl
14  -->userdefinedvars.pkrvar.hcl
You can have a set of folders per operating system .
Configuration Files, Scripts and Drivers
All Packer configuration files use the file extension; .pkr.hcl apart from your user defined variables file which uses the .pkrvar.hcl extension. Lets take a look at each file.
Variables Declaration file (example - variables.pkr.hcl): This file is where you declare all the variables you want to reference in your source, build or provisioner blocks. This includes user defined variables and environmental variables.
User Defined Variables file (example - win2019.pkrvar.hcl): This file is where you will define your user variable values. This could include values for Template Name, CPU, RAM and disk size for instance. These variable values are in plain text, therefore you don’t want to be keeping sensitive values such as passwords in this file in any scenario outside of a lab. These can be handled by environment variables which we will see in later parts of the series.
‘Build’ file (example - win2019_.pkr.hcl): This is where you define your template using a Source Block that we mentioned earlier, and build it using a Build Block. In this case we are going to be using the ‘vSphere-ISO’ Source.
Operating System Answer File (example - autounattended.xml: This is the answer file needed to complete the installation of your operating system. For Windows this would be an autounattend.xml file and for CentOS, a kickstart.cfg file.
Scripts and Drivers: Finally you will need any scripts, drivers or media ready to reference in either the answer files or for use by a provisioner. The output file is not a prerequisite, as this is generated by the post processor at the end of the build.
In a later part of this series I will break down each of the components and blocks, and explain the content of a Windows and Linux template build in further detail.
So what next? In part 2, we will take a closer look at the operating system answer files and some example scripts & drivers that can be used or are required.
Thanks for reading!