Following on from my last post on vSphere 7.0 certificate Management, I wanted to continue with another certificate related post. This one being Site Recovery Manager (SRM) 8.3. Like vSphere 7.0, this version seems simpler than previous versions I have used.
With SRM, it’s the Appliance Certificate replacement that I am going to take you through in this blog post.
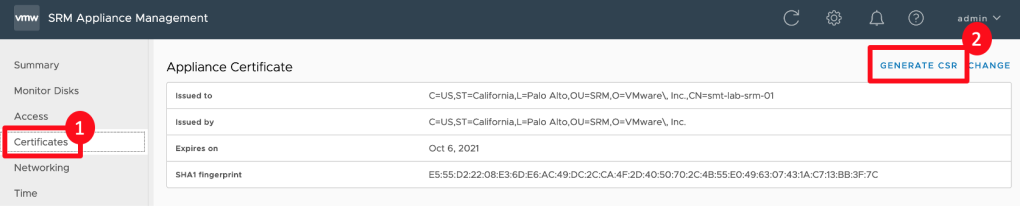
Firstly log into the SRM appliance management console via https://<srm-fqdn>:5480 and select the ‘Certificates’ option on the left, followed by ‘Generate CSR’ in the top right.
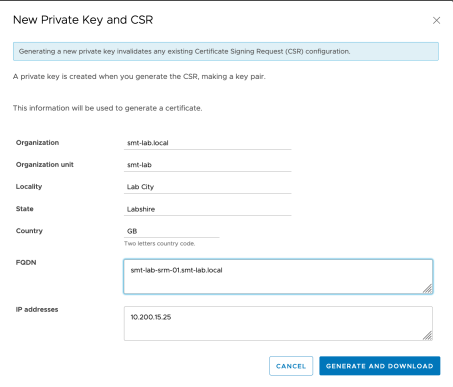
Fill in the information for your certificate, then click ‘Generate and Download’. You then need to process the CSR with your certificate authority, whether thats an internal, public or lab CA.
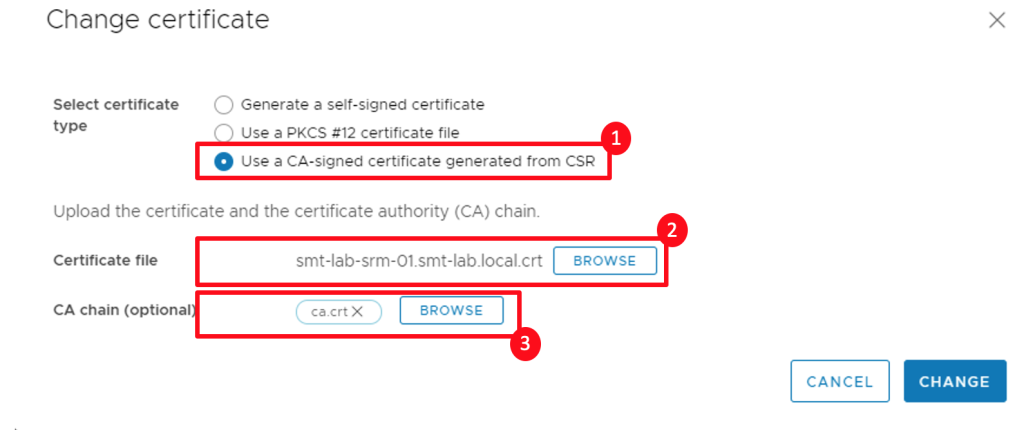
Once you have your certificate, select the ‘Certificates’ option on the left again, this time followed by ‘Change’ in the top right.

Select the last option in the Select certificate type section; ‘CA-signed certificate generated from CSR’. Then, browse both your newly generated certificate and either you root CA certificate, or the CA chain. Click ‘Change’ once done.
This should complete the replacement of the SRM appliance certificate!
If like me you get an error complaining that the IP or Common name / SAN is missing, make sure the local host field is set to the FQDN when connecting SRM to vCenter.

Thanks for reading!