
James Tiffany
Monday, January 12, 2026 | 6 minutes
VMware vSphere Foundation (VVF) Day 2 Operations
Adding VCF Operations for Logs 9.0
Unlike in VMware Cloud Foundation VCF Operations for Logs is a manual deployment as there is no Fleet Management functionality. This is also the same for patching which will be covered in the next blog in the series.
So to deploy VCF Operations for Logs, you first need to download the OVF file from the Broadcom Support Portal.
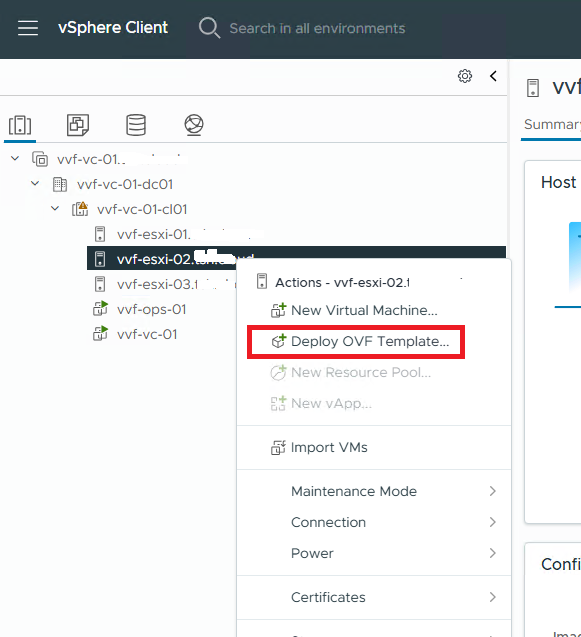
Once downloaded open vCenter Right click the cluster or a Host and from the drop down menu choose Deploy OVF Template
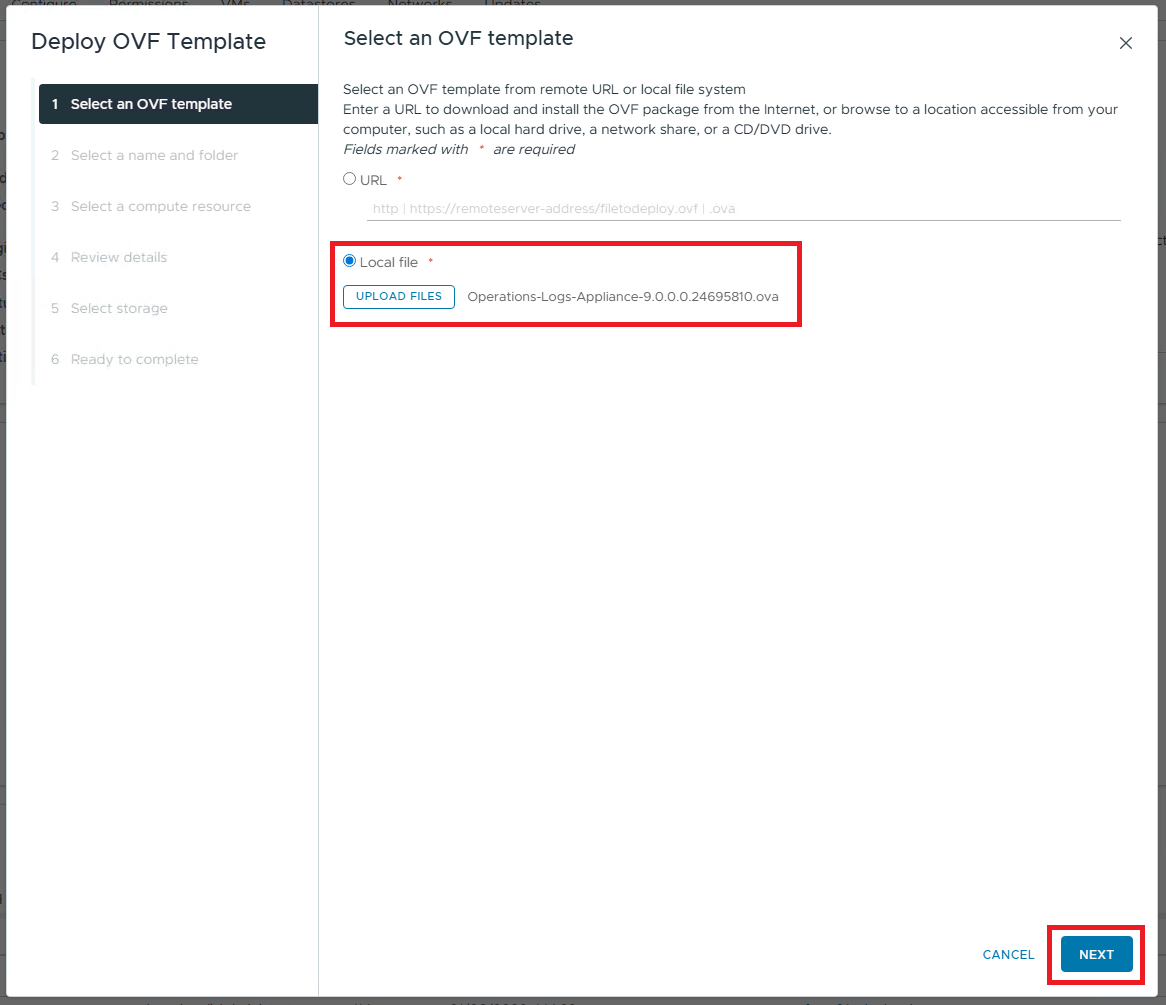
On the first screen of the deployment wizard choose the Local File and browse to the location of the file and click Upload Files and then click Next
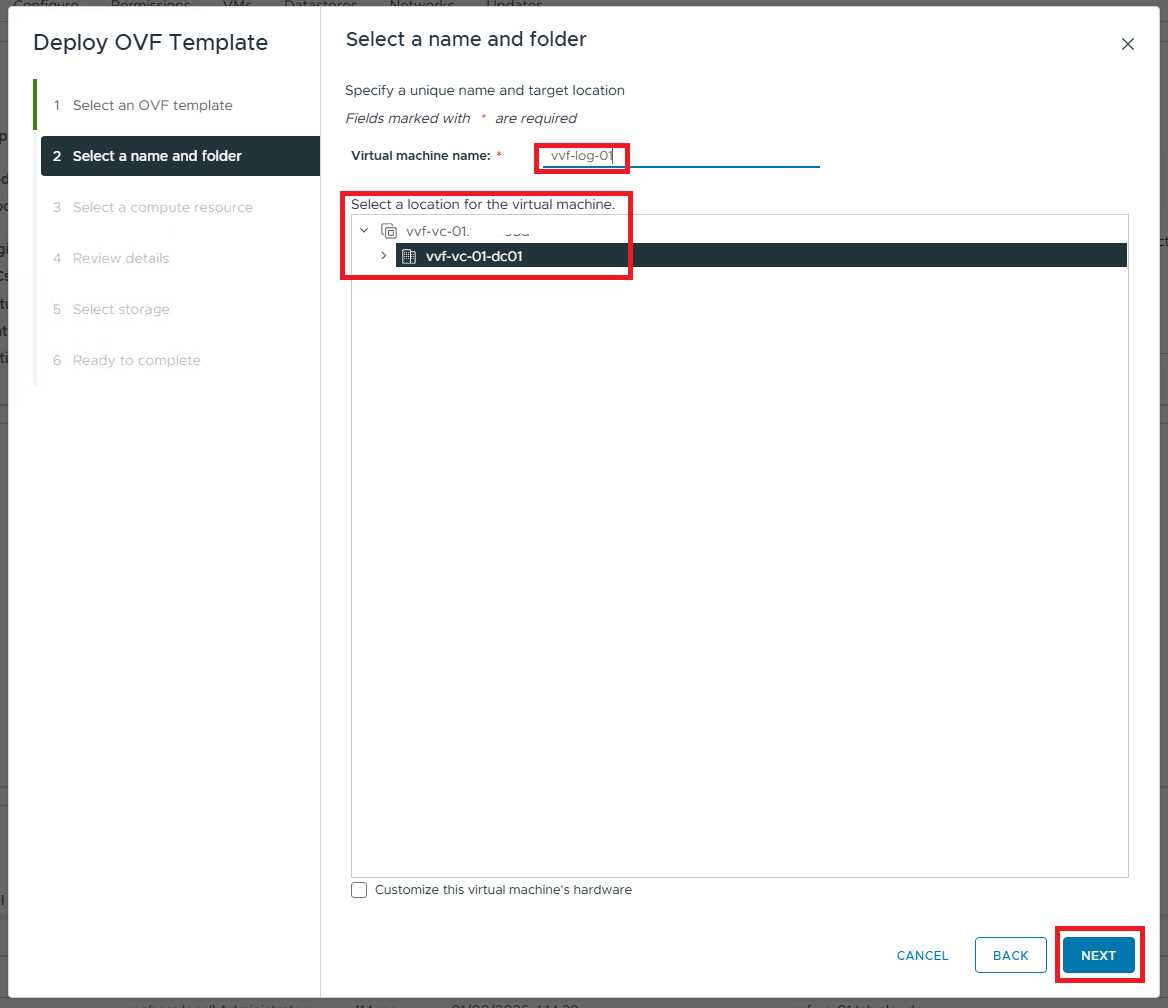
In the Select Name and Folder screen give the virtual machine name that will be seen in vCenter and choose a location and then click Next
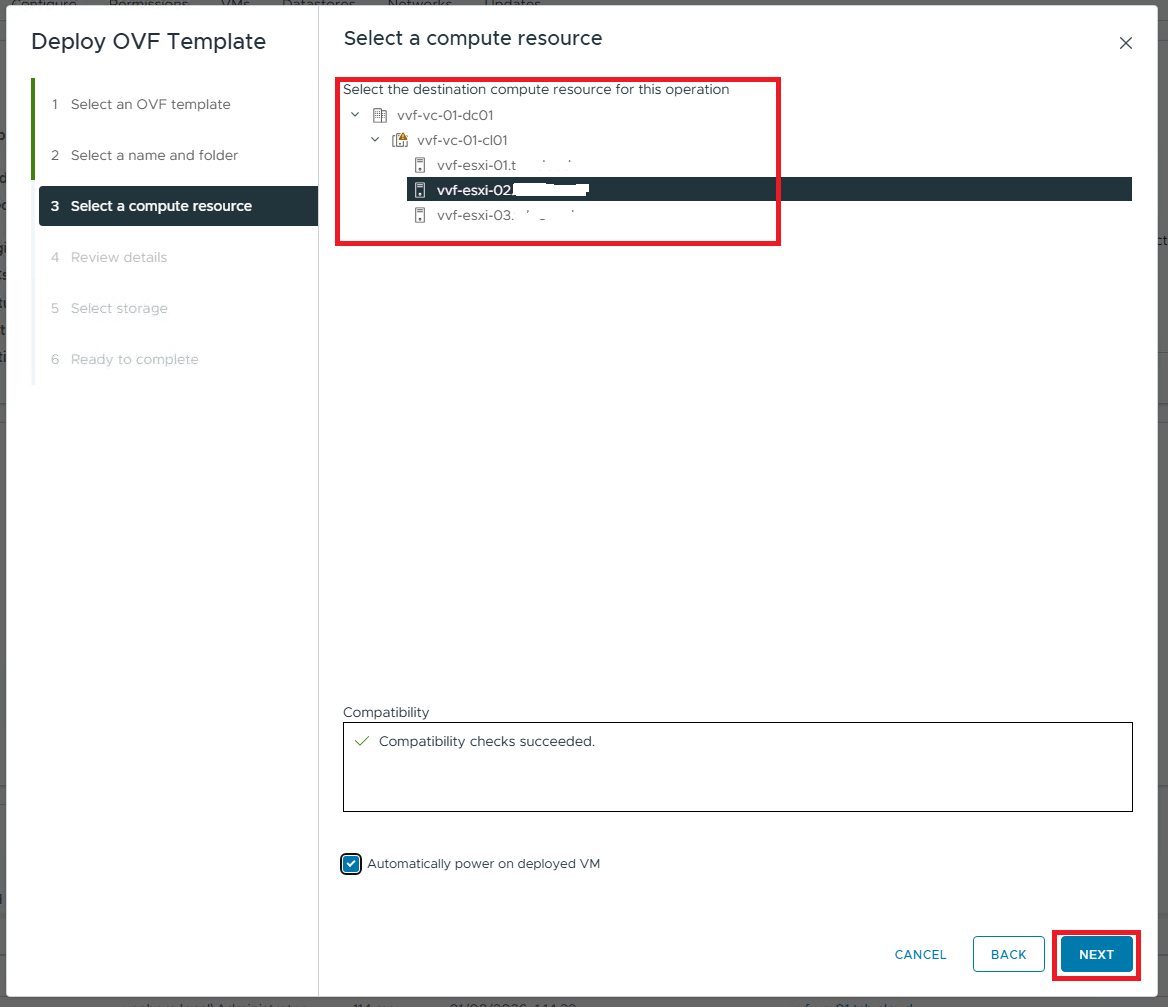
In Compete Resource choose the cluster or host you want the machine to be deployed too. Then Click Next
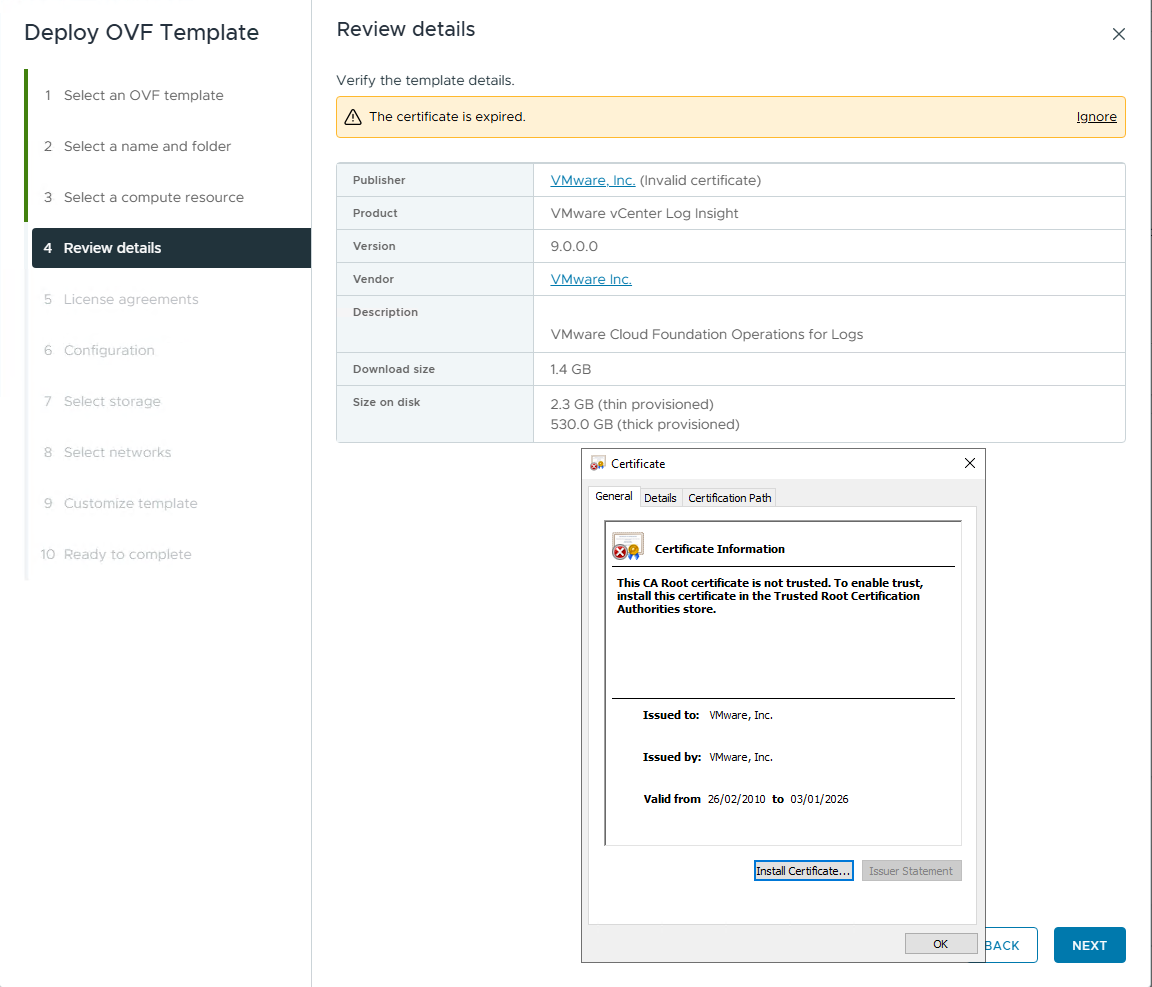
On the Review Details, the screen will refresh with details of the OVF to deploy. Please note as shown below at the time of writing there is an issue with the certificate used in the appliances. This expired in the first week of January, to continue the deployment you will need to click on the Ignore button at the top of the screen before clicking Next to continue. There is no work around for this, you will see the same issue deploying the latest 9.0.1 OVF.
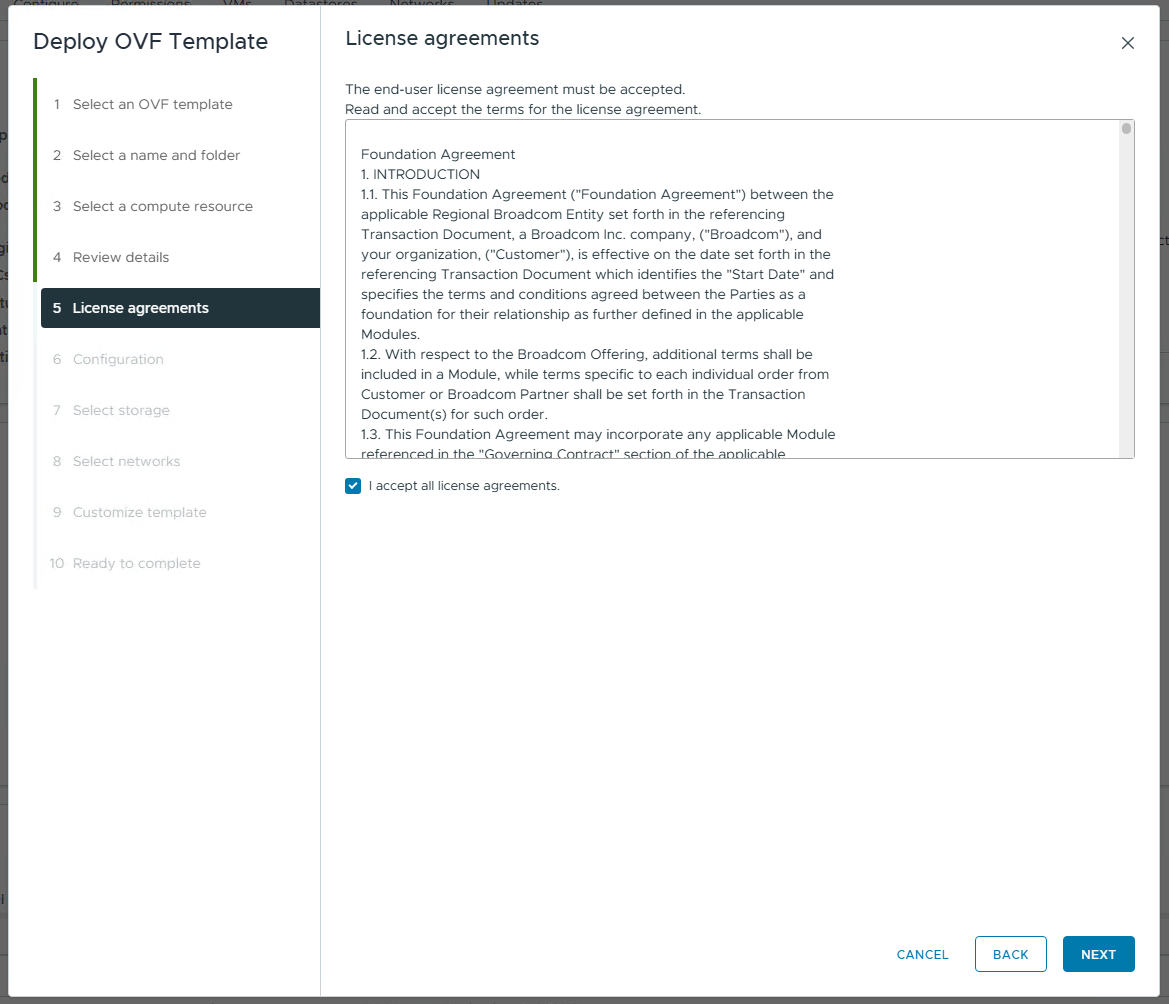
Click the box to Accept the License Agreement and then click Next
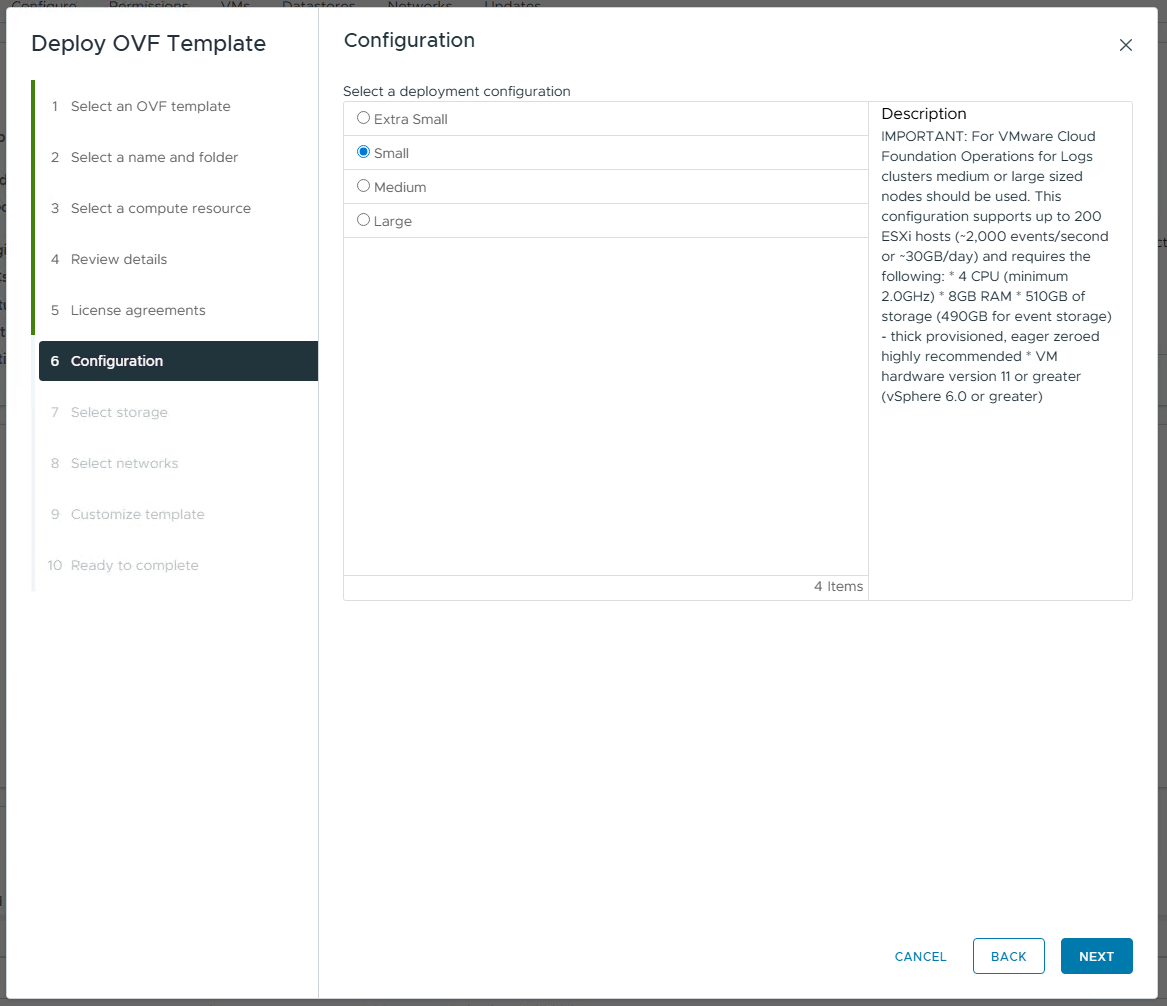
In the Configuration option you are able to choose the size of the deployment PLEASE NOTE if you deploy an Extra Small deployment size you will not be able to patch this in the future without making changes to the deployment. This is a known issue https://knowledge.broadcom.com/external/article?articleNumber=382217 Choose the size and it will tell you the requirements in the description. Make the selection and then Next to continue
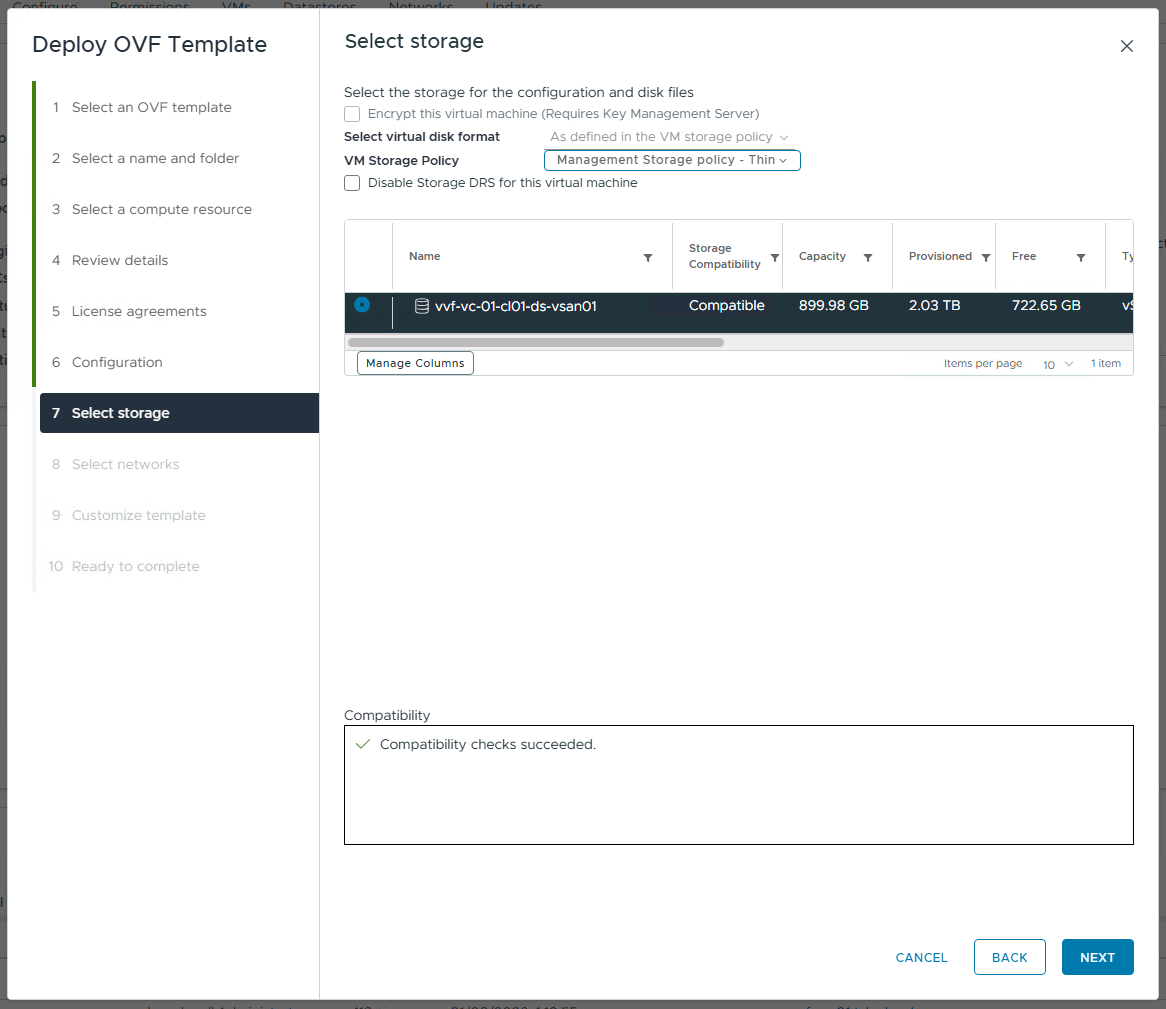
Choose your Storage location and Policy if applicable and then Next to continue
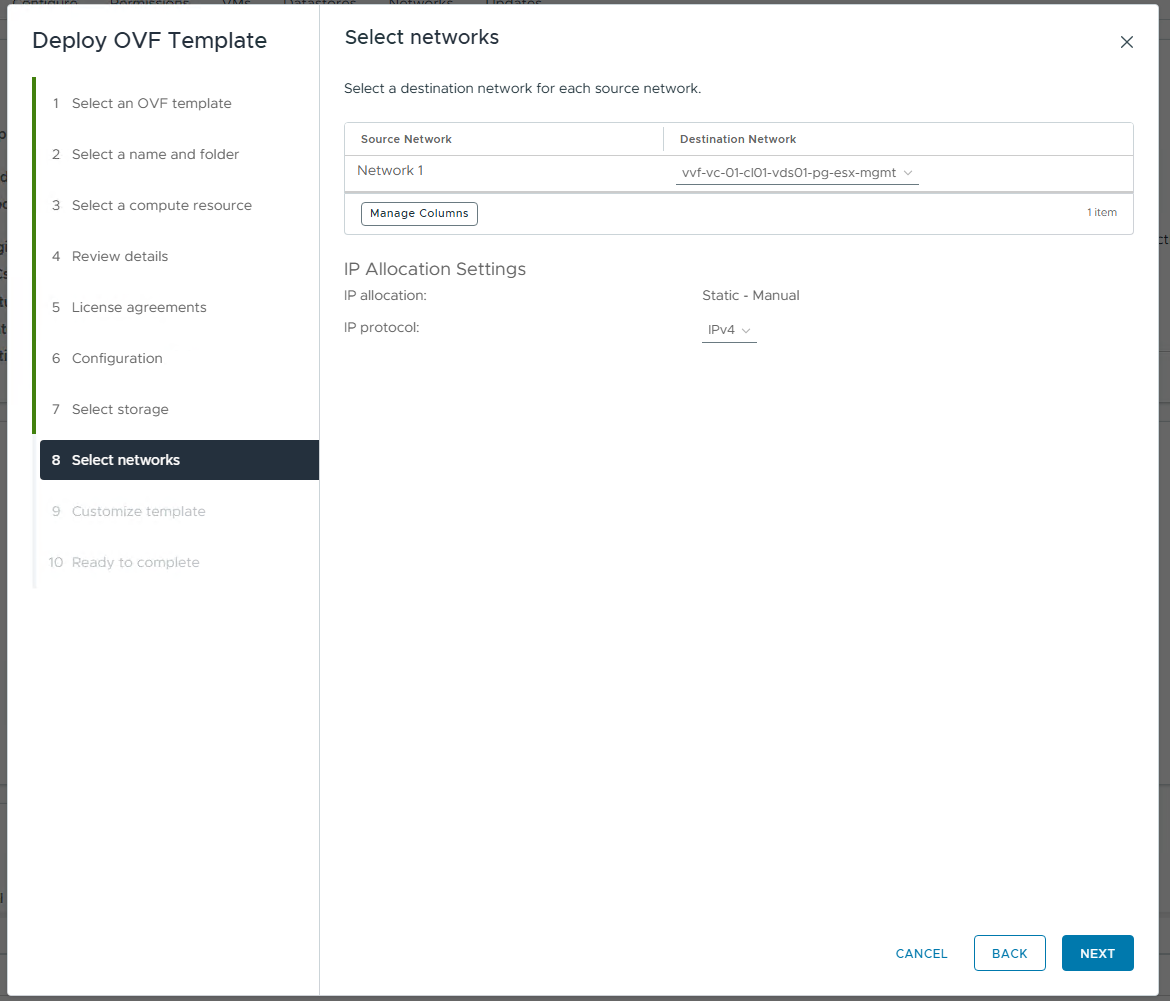
On the Select Networks page choose the network the VCF Operations for Logs appliance will be running on from the drop down box and then Next
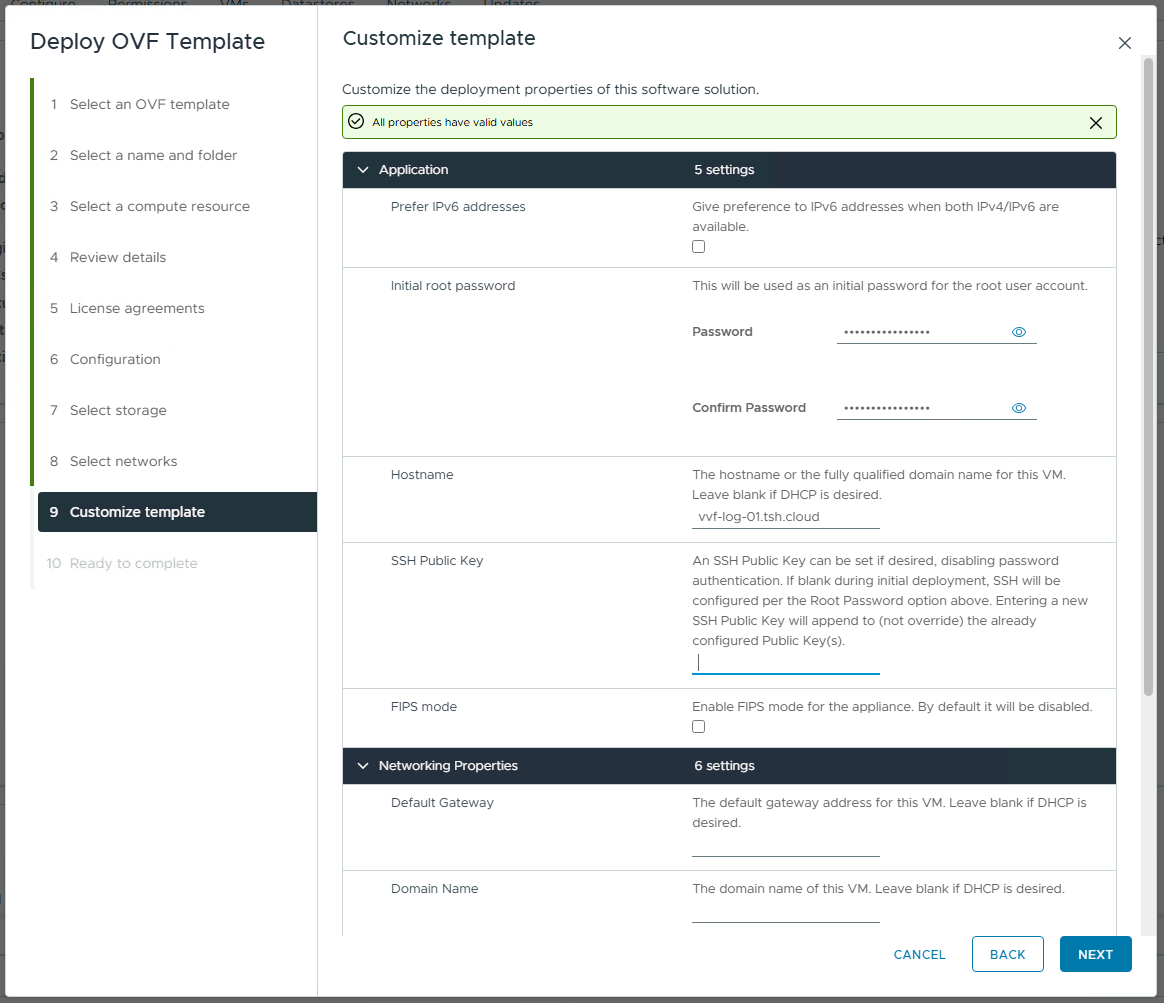
The Customize Template Screen is where the majority of the information is added to configure the appliance. You will nee to add FQDN, IP details and passwords. Once all these are complete and correct hit Next to continue
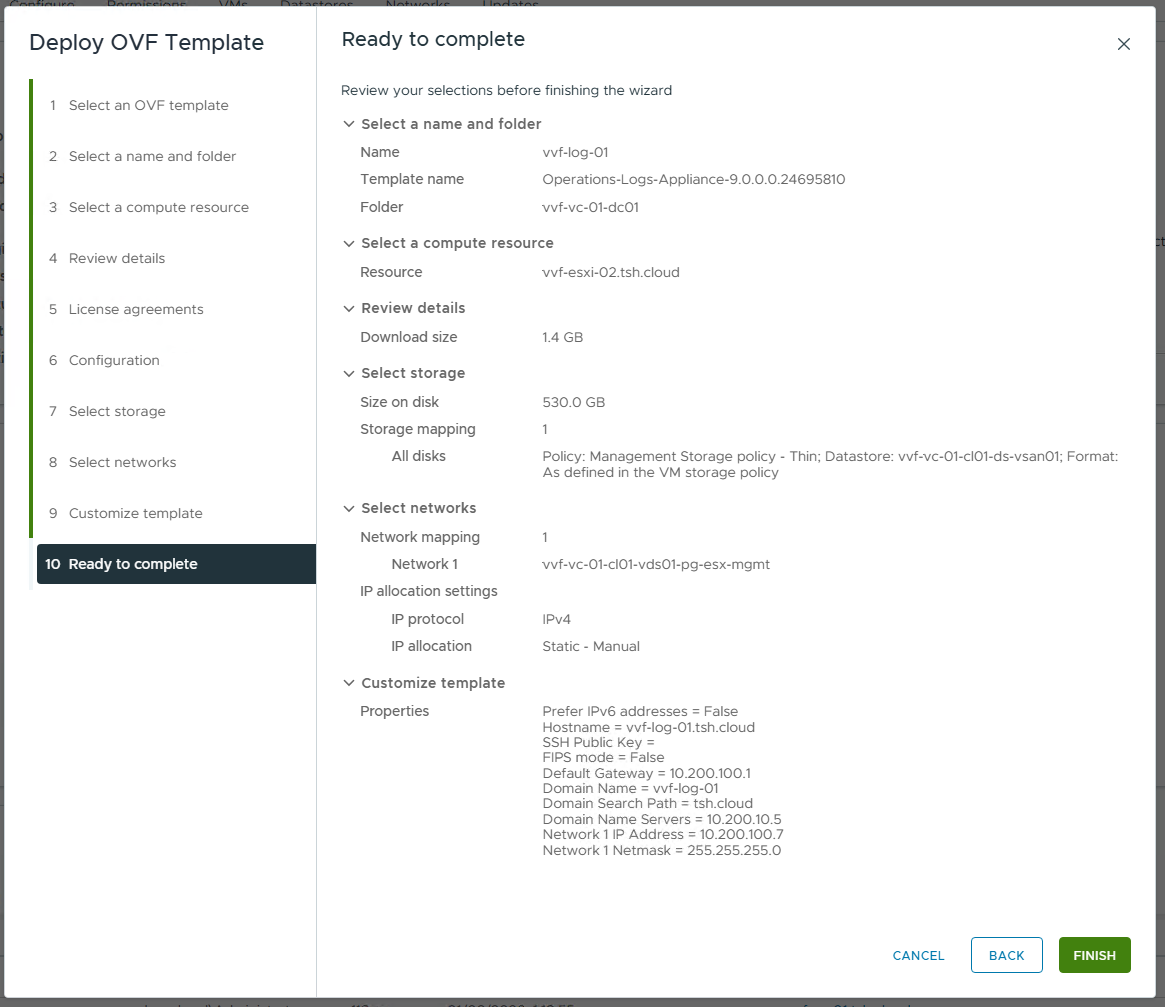
Confirm all the information is correct on the screen and then hit Finish to start the deployment.
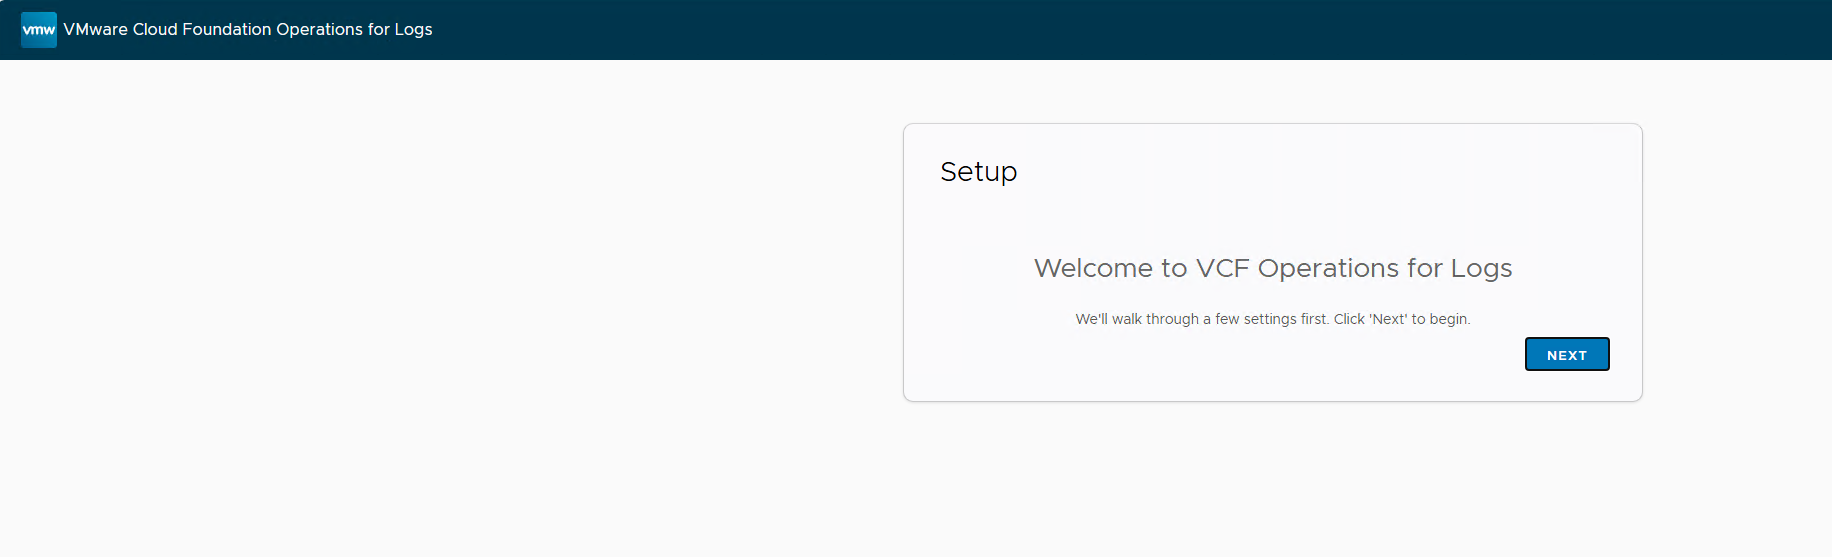
You will have to power on the Appliance once the OVF Deployment is complete and the appliance will reboot a number of times whilst applying the configuration. You will be able to see this in the vCenter virtual machine remote window that it will eventual be on a blue screen with the IP address details. You can then open up a browser window to complete the Setup of the VCF Operations for Logs appliance.
On the first log in you will ne presented with the Setup Wizard so if you are ready click Next to continue the process
The initial process for expanding a cluster or creating a new one has the same starting point with the OVF deployment, so the wizard will ask you if you want to join an existing deployment or start a new one. Click on Start a New Deployment

You will see the following screen for a few minutes whilst the process starts

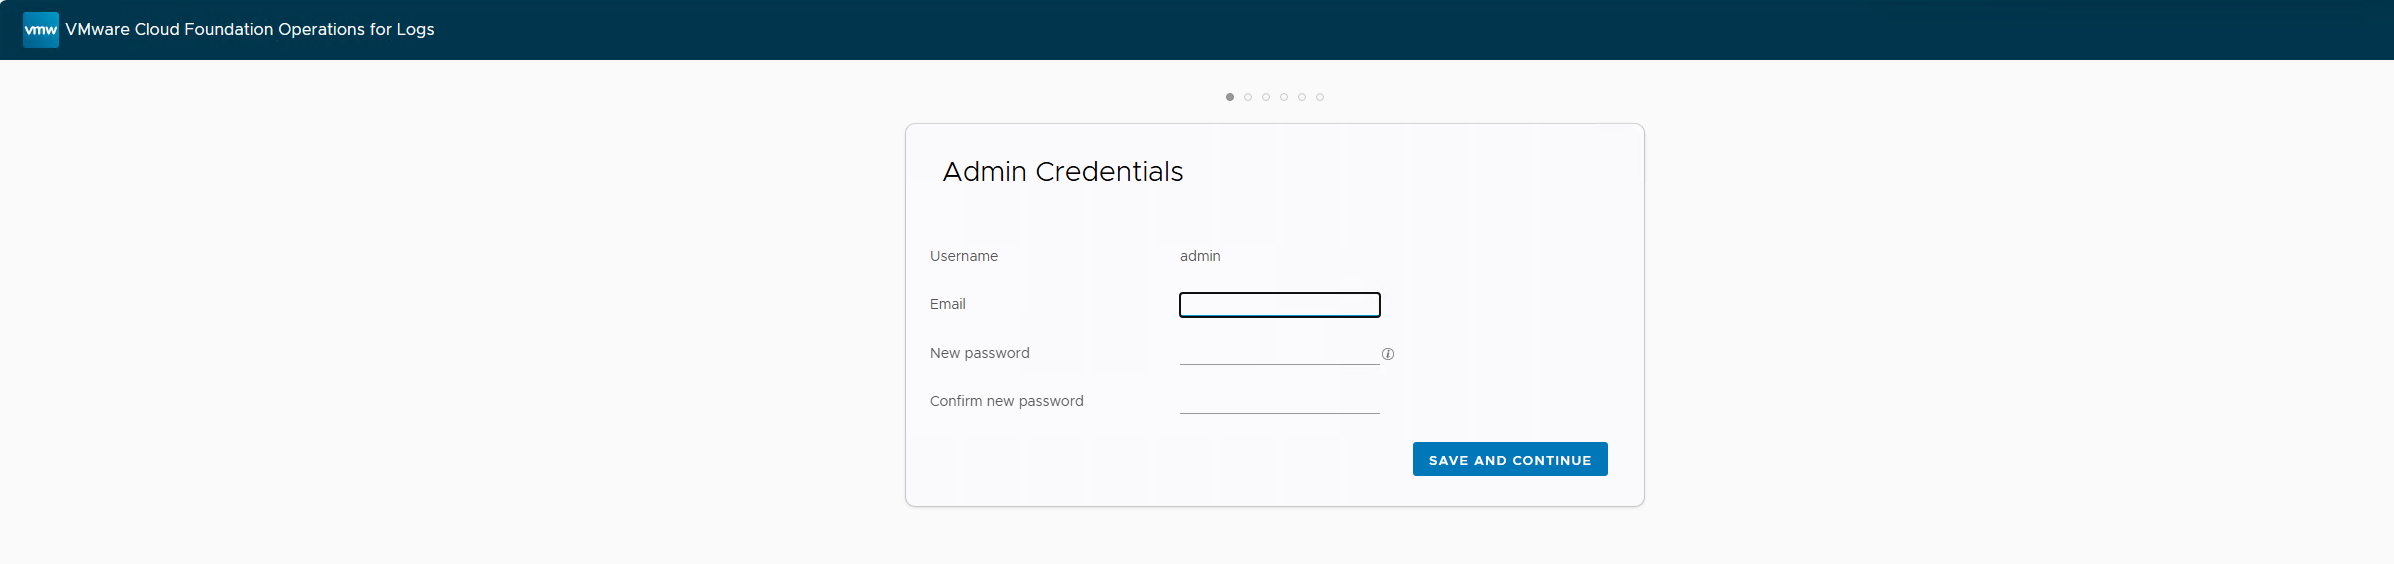
Enter the details that will be used for the Admin User. The email does not need to be real as it will not be checked and make sure the password complies to the complexity policy, then click Save and Continue
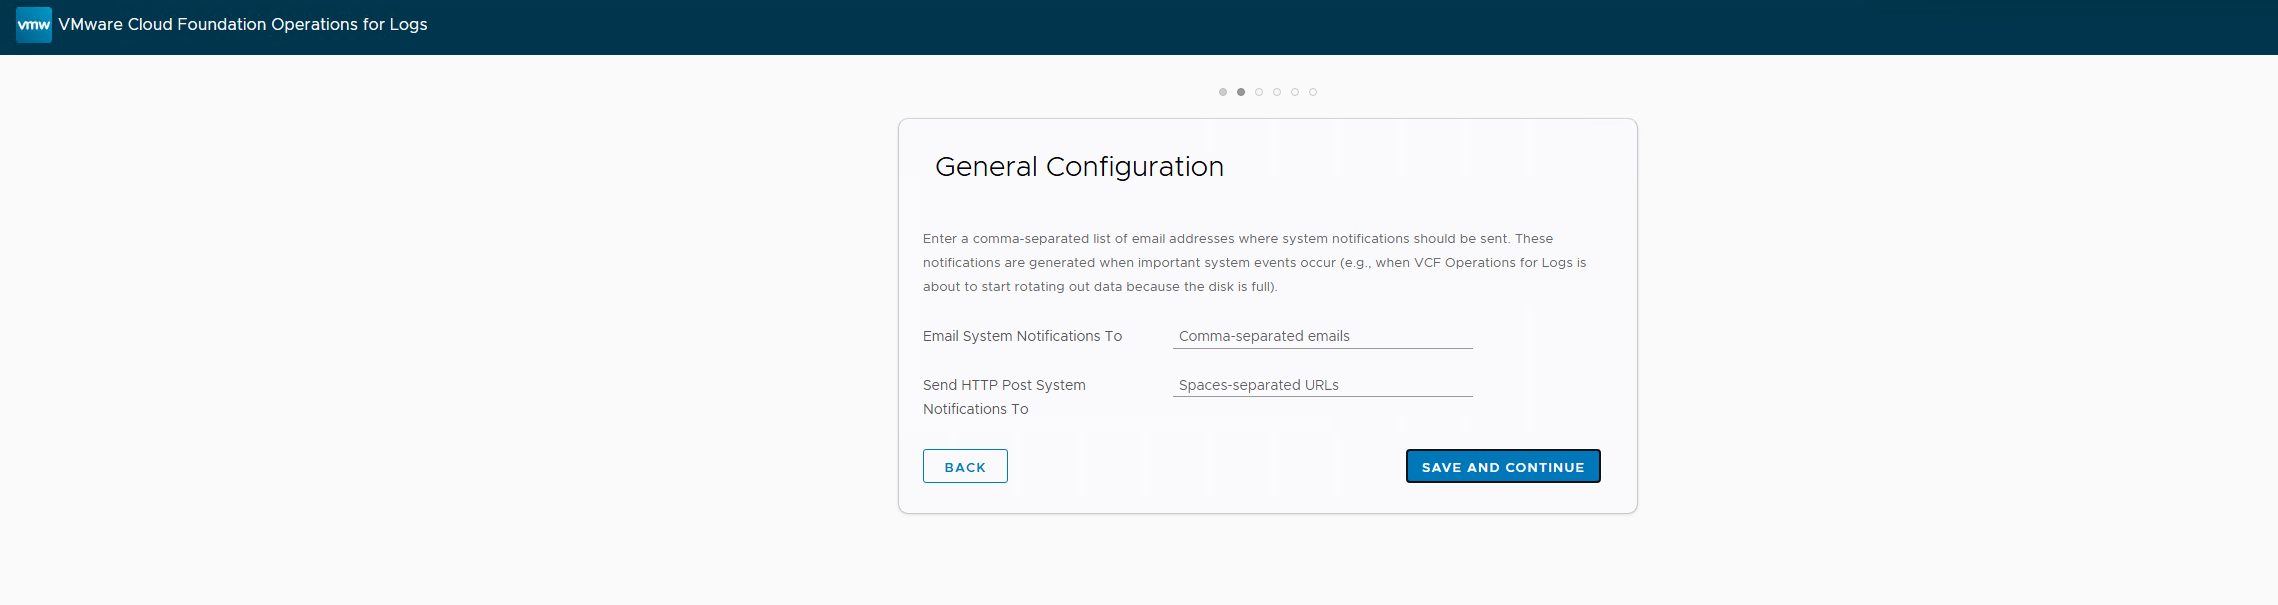
If you plan to use email notifications you can enter the details here, you can also set these up later. You don’t have to enter anything and can click on Save and Continue
In the Time Configuration section change the Sync Time With option to NTP Server. In the NTP servers window enter one or more NTP servers for your environment then click on the test button and as per below you should receive the Succeeded response. Then you are free to click Save and Continue. If you have errors please rectify these before continuing, time in a logging system is a critical component.

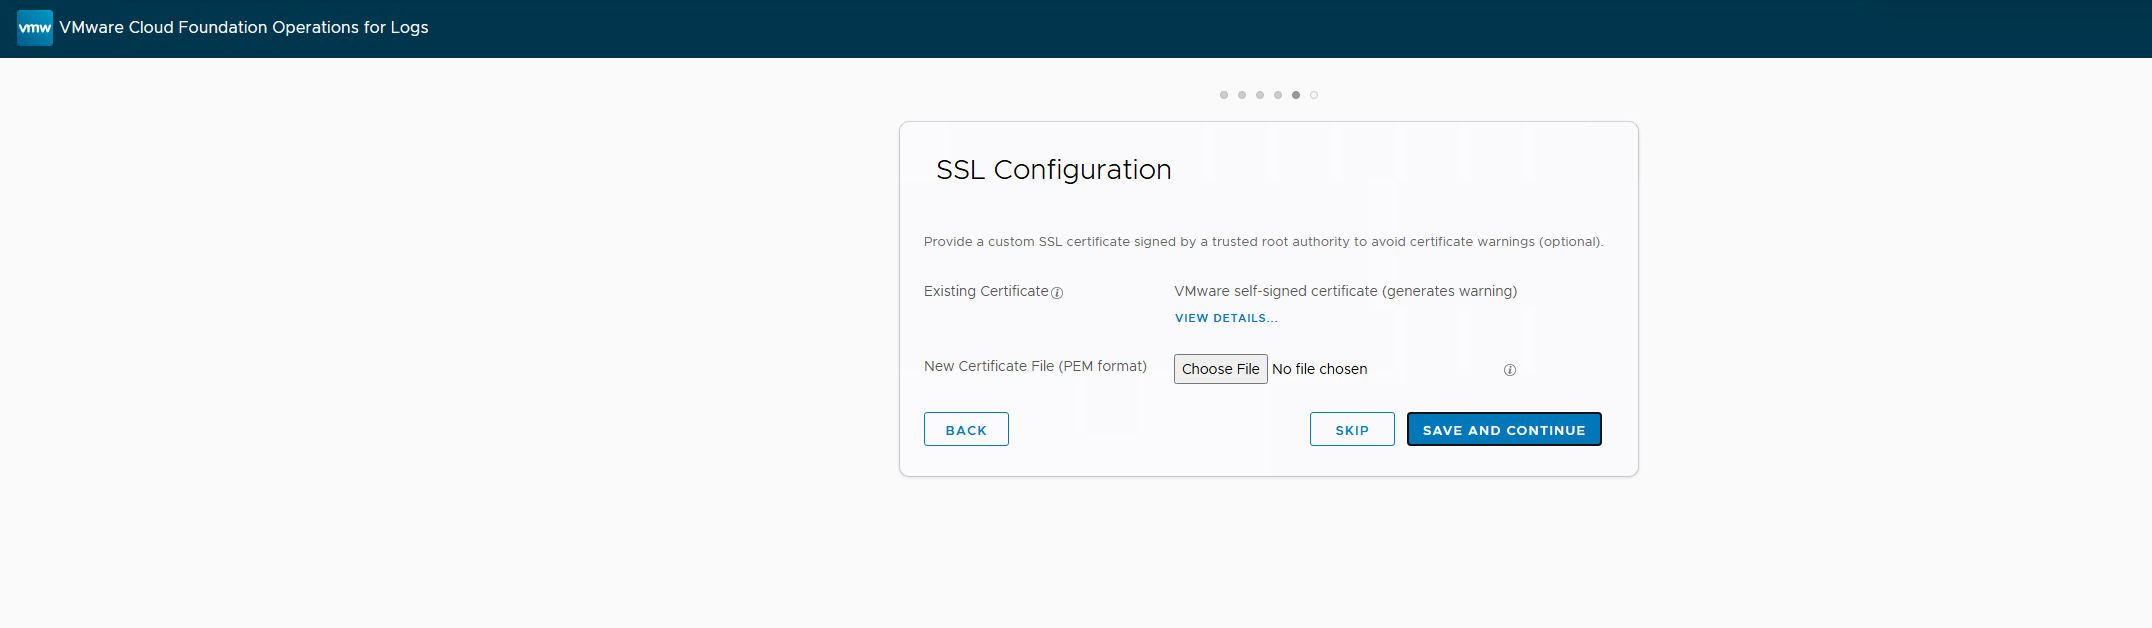
You have the option to add a new certificate in the SSL Configuration section. If you want to use the default self-signed then click on Save and Continue
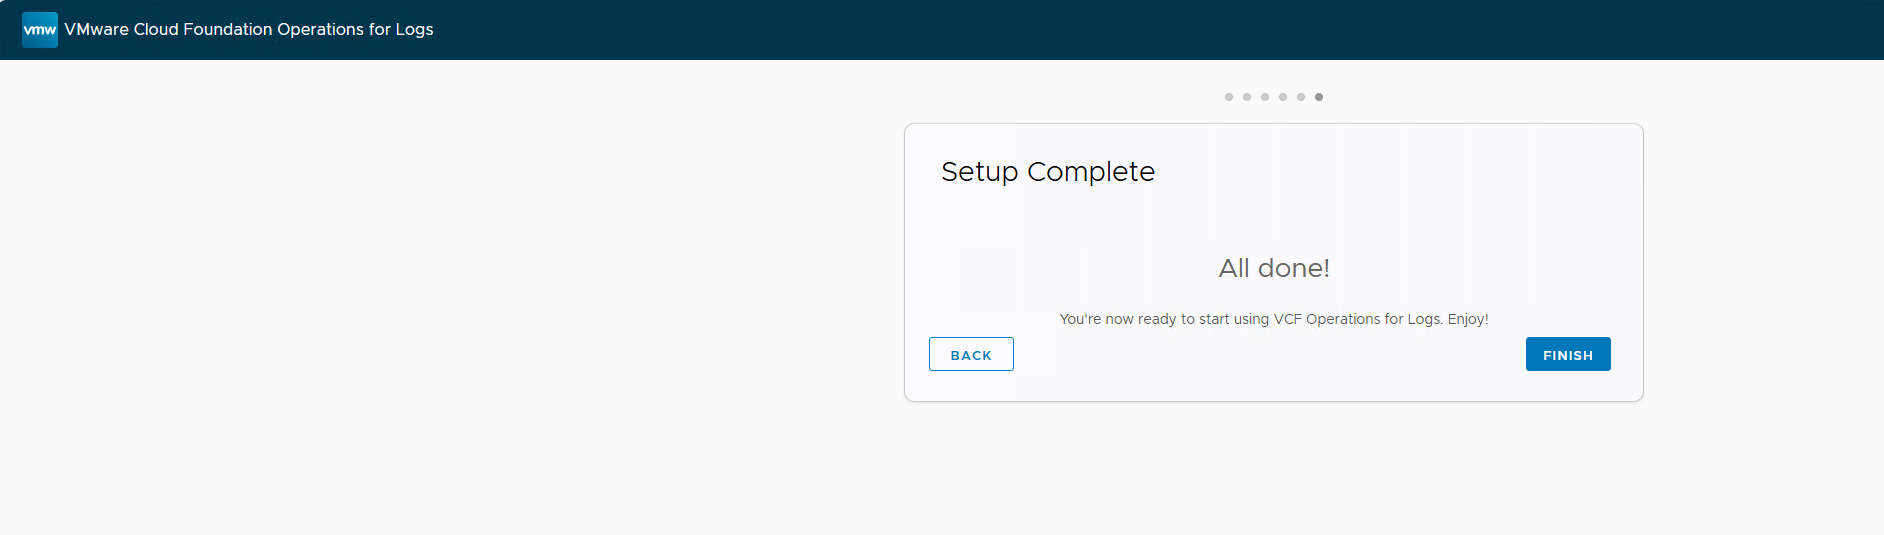
You have now completed the Wizard and can click on Finish.
After a period of time you will then be able to log onto the UI
We are not quite finished, whilst we have a working VCF Operations for Logs instance it is not connected to VCF Operations and is not collecting any data.
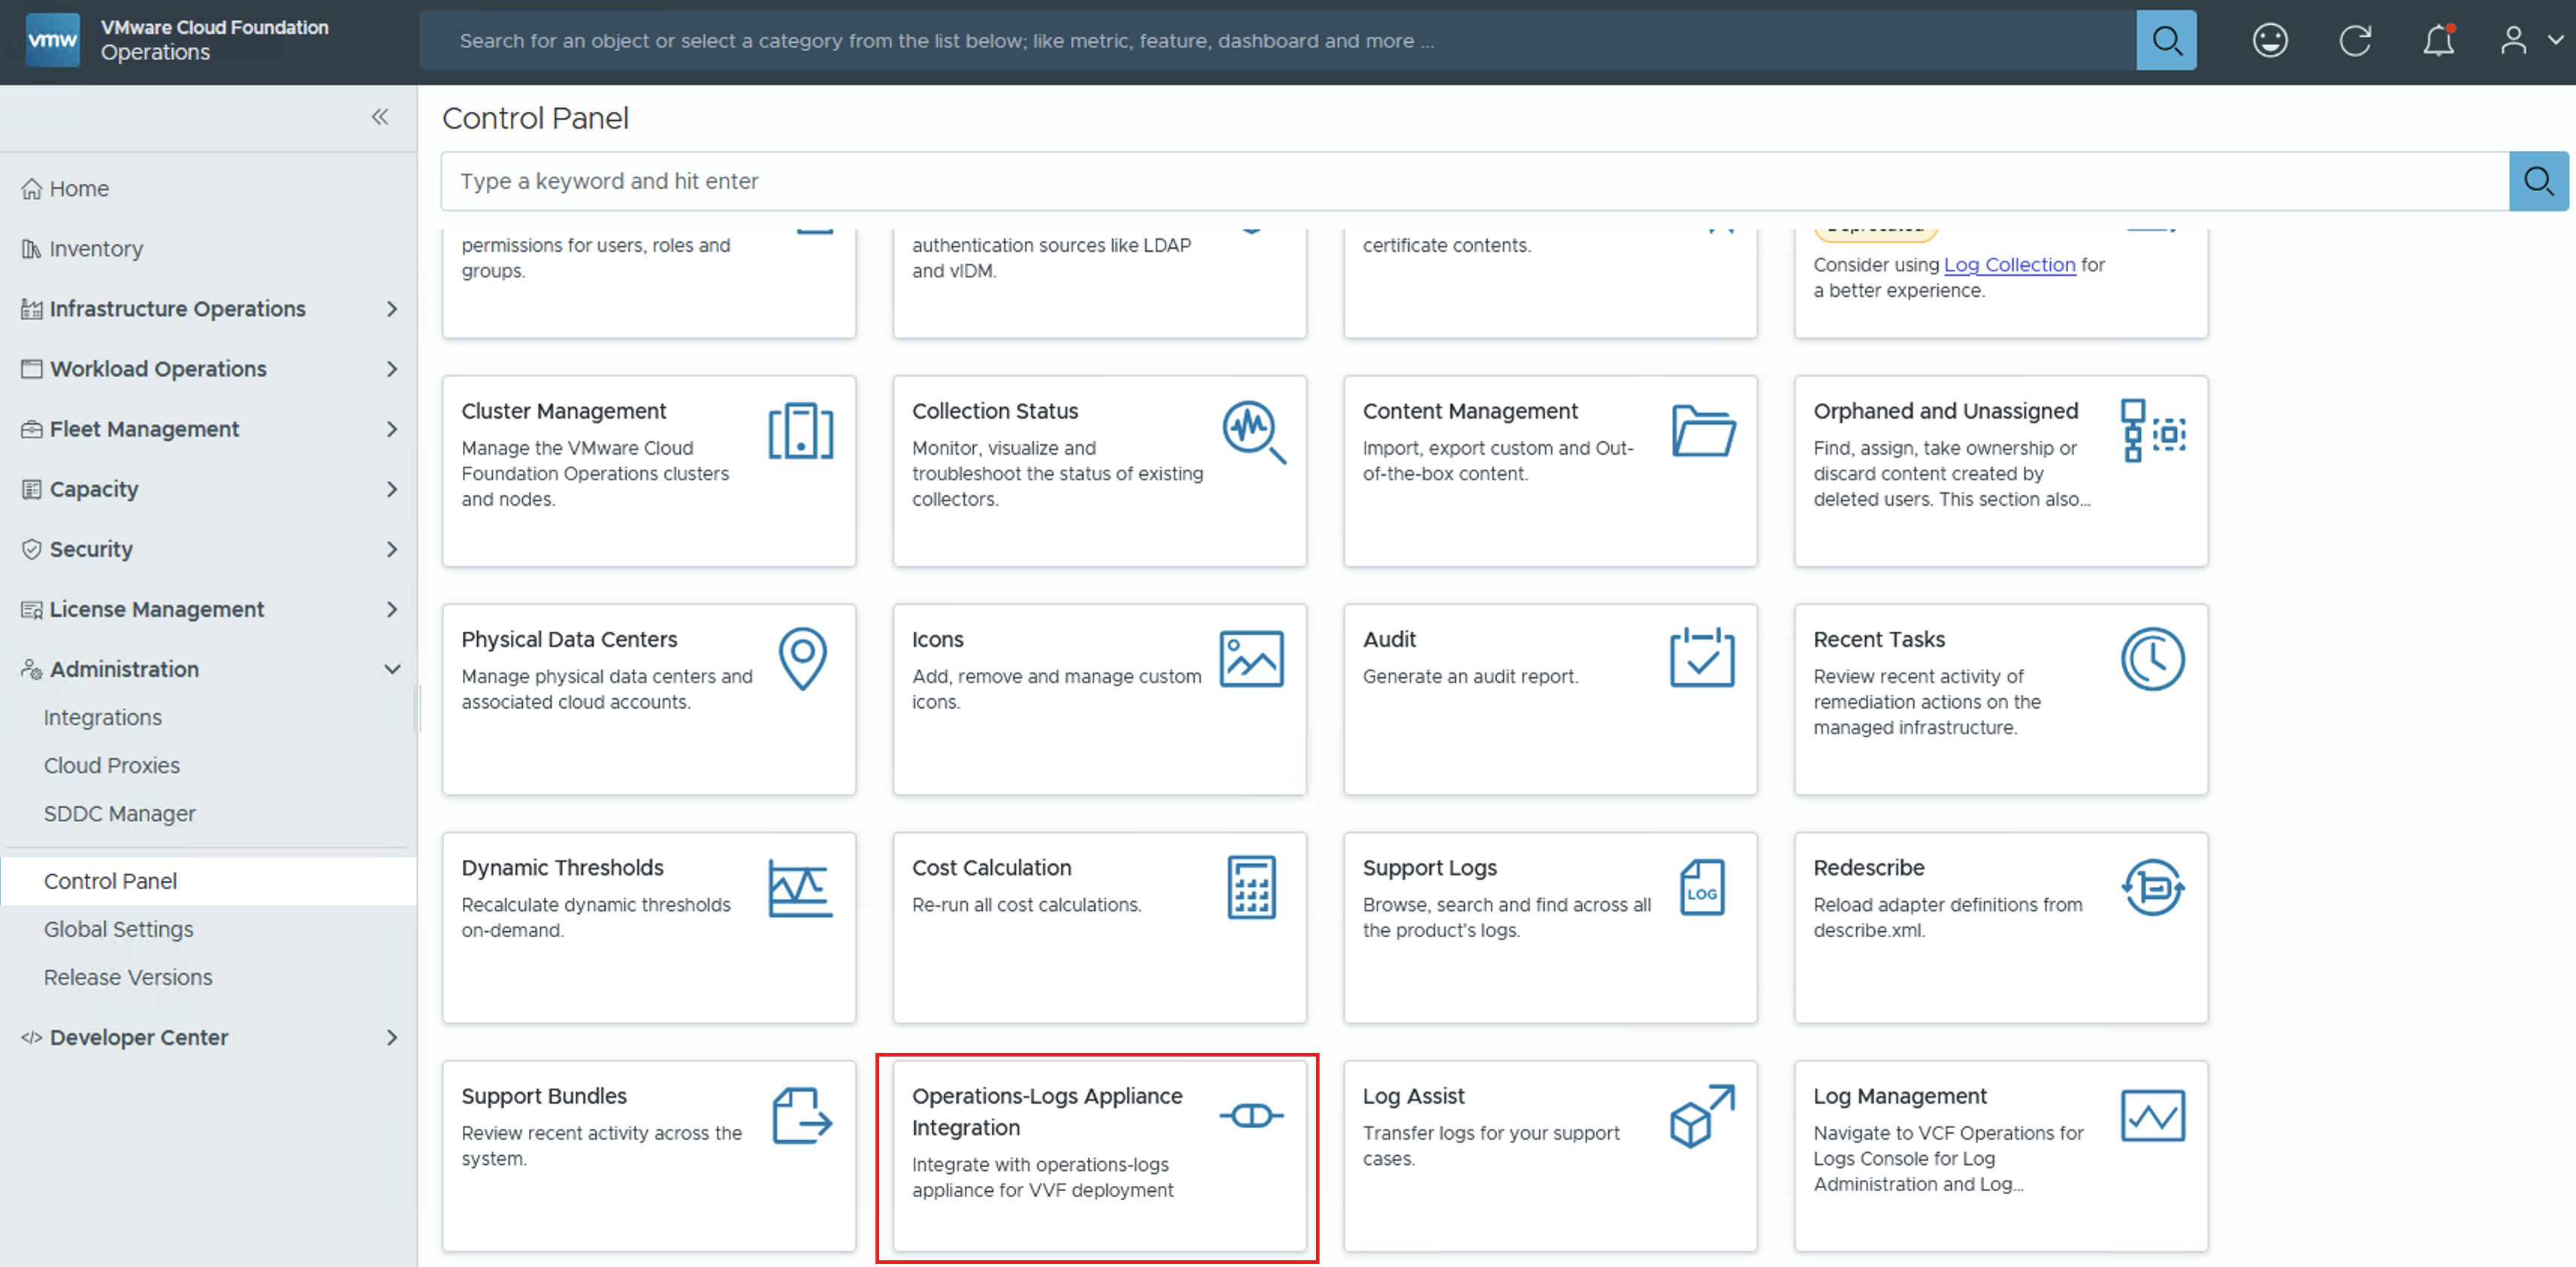
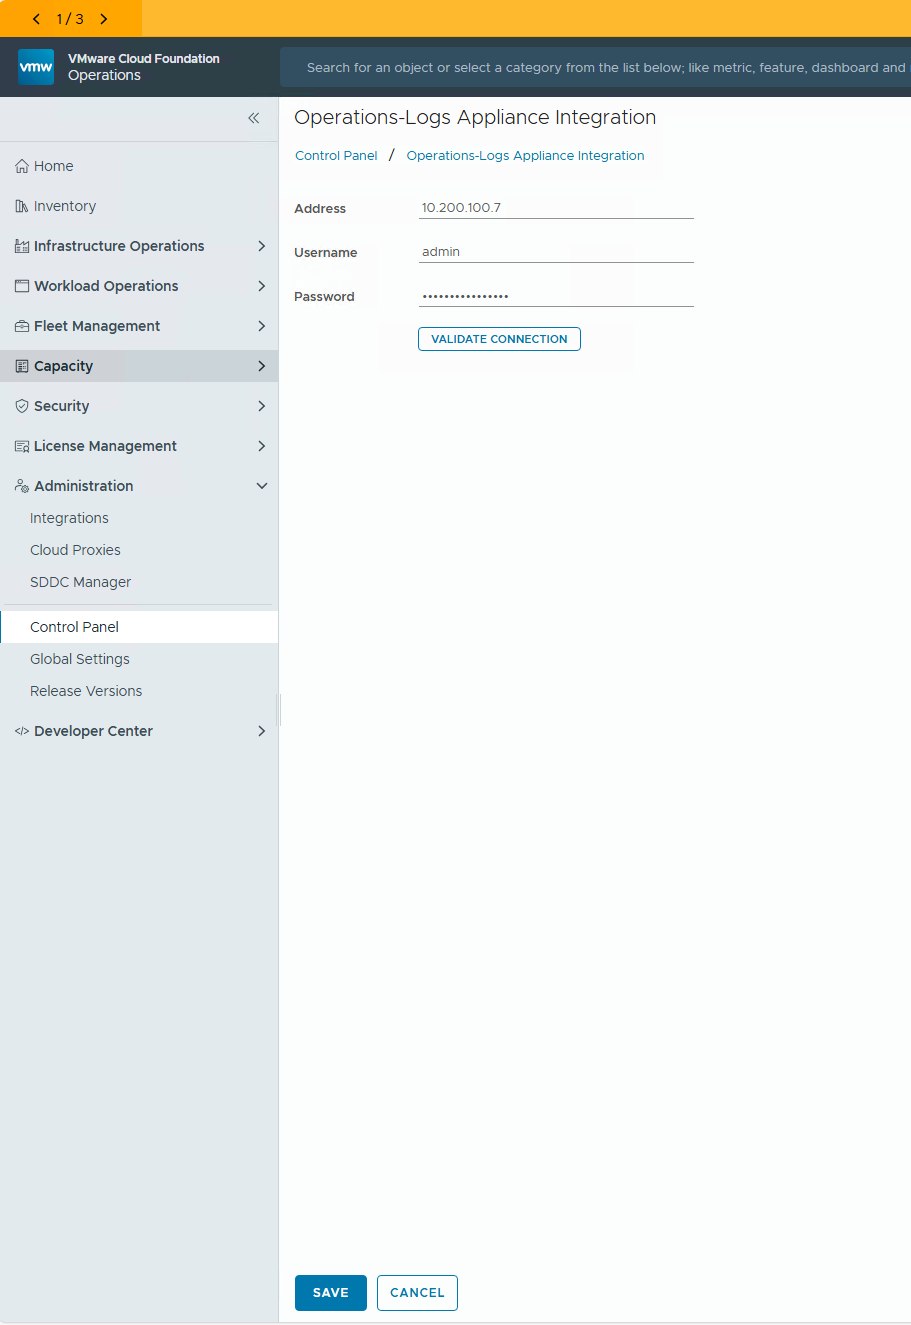
Open a browser to the VCF Operations instance and log in with the Admin account. Once you in the console then using the left hand pane navigate to Control Panel and then click on the Operations-Logs Appliance Integration tile
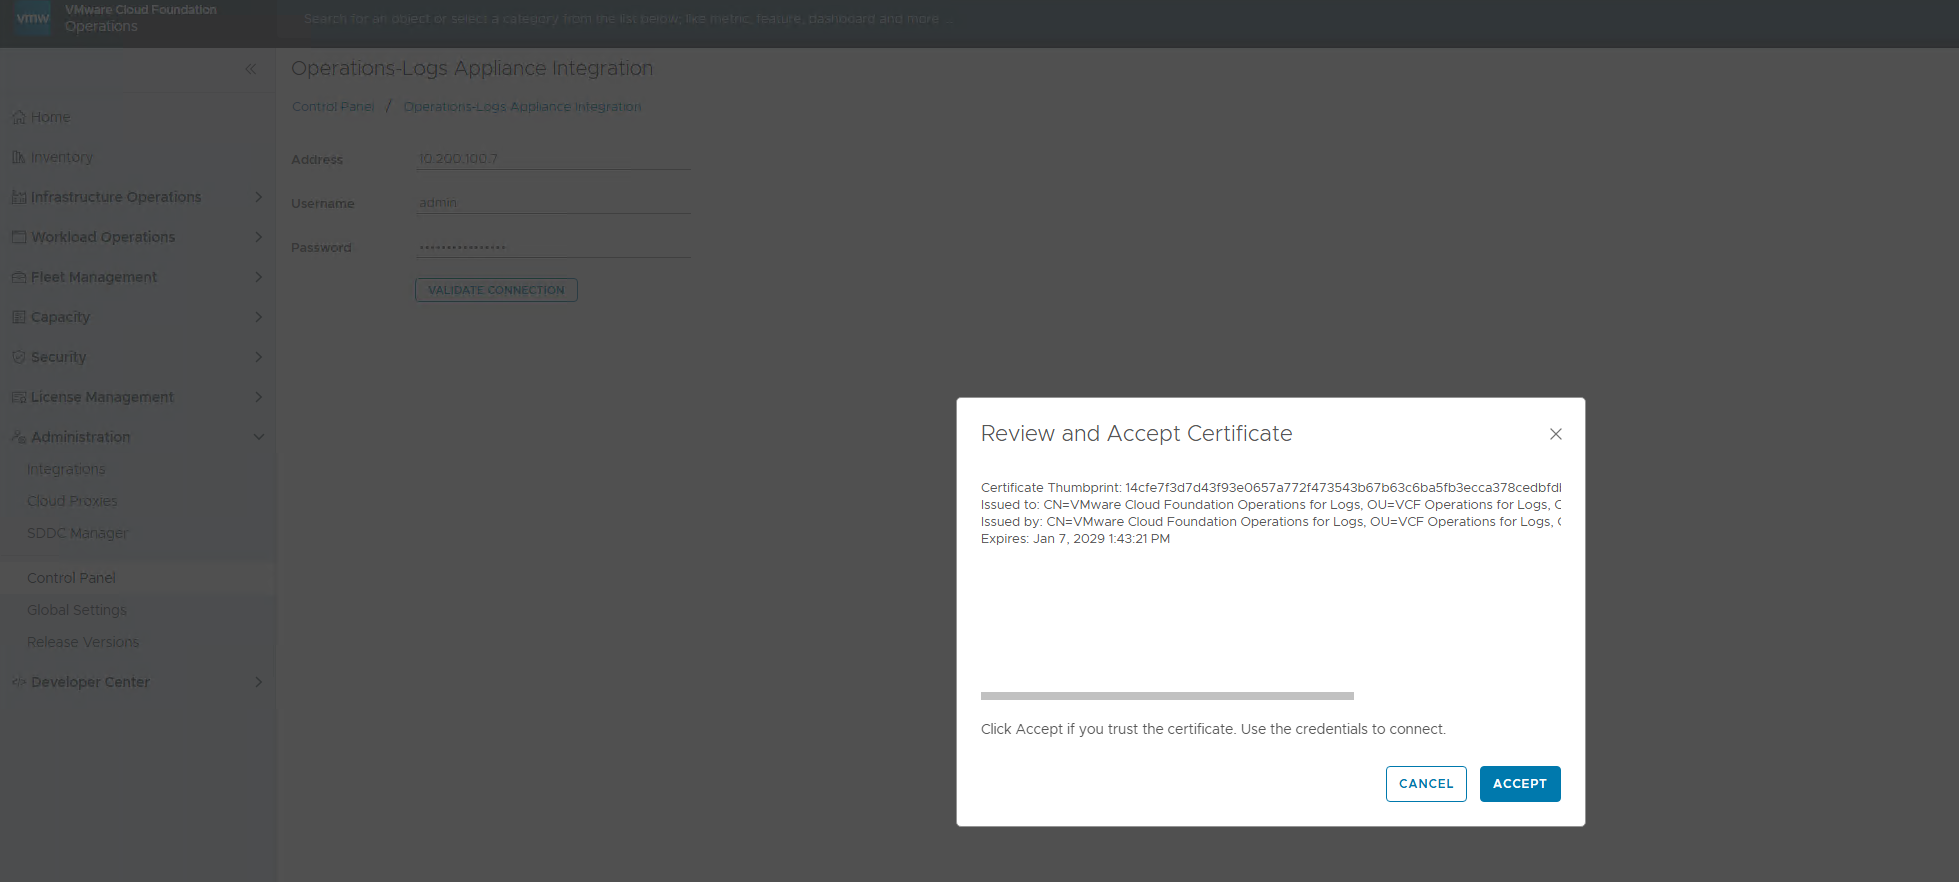
On the Operations-Logs Appliance Integration window enter the IP address of the VCF Operations for Logs appliance or the VIP if you have a highly available solution. Enter a user name and password to connect. If you have the Logs appliance integrated you could use a service account or create a local account so you don’t have to use the admin account.
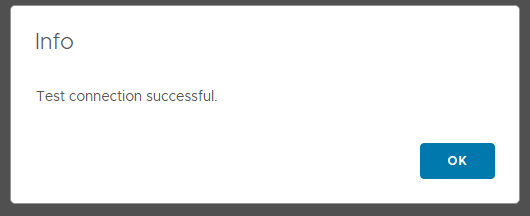
Click on Validate Connection to ensure the account works, you will be asked to Review and Accept the certificate click Accept
Then click Ok on the Successful message
Click on the Save Button
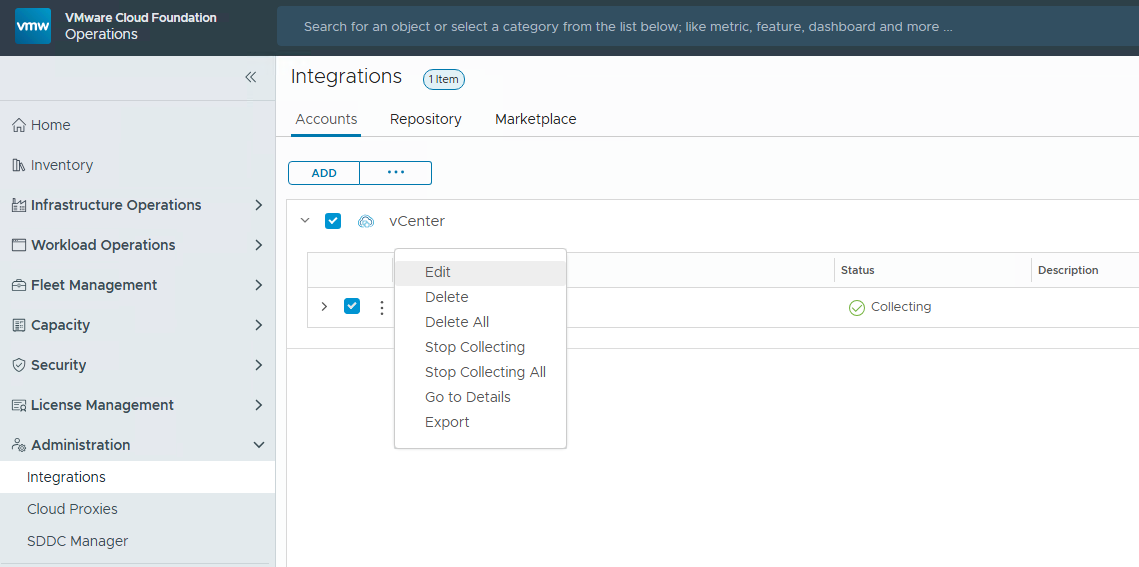
There is one final step to allow for full integration and log collection. In the left pane Navigate to Administration \ Integrations. Locate the first vCenter you want to enable for log collection. Click on the three dots beside it and from the drop down menu choose Edit
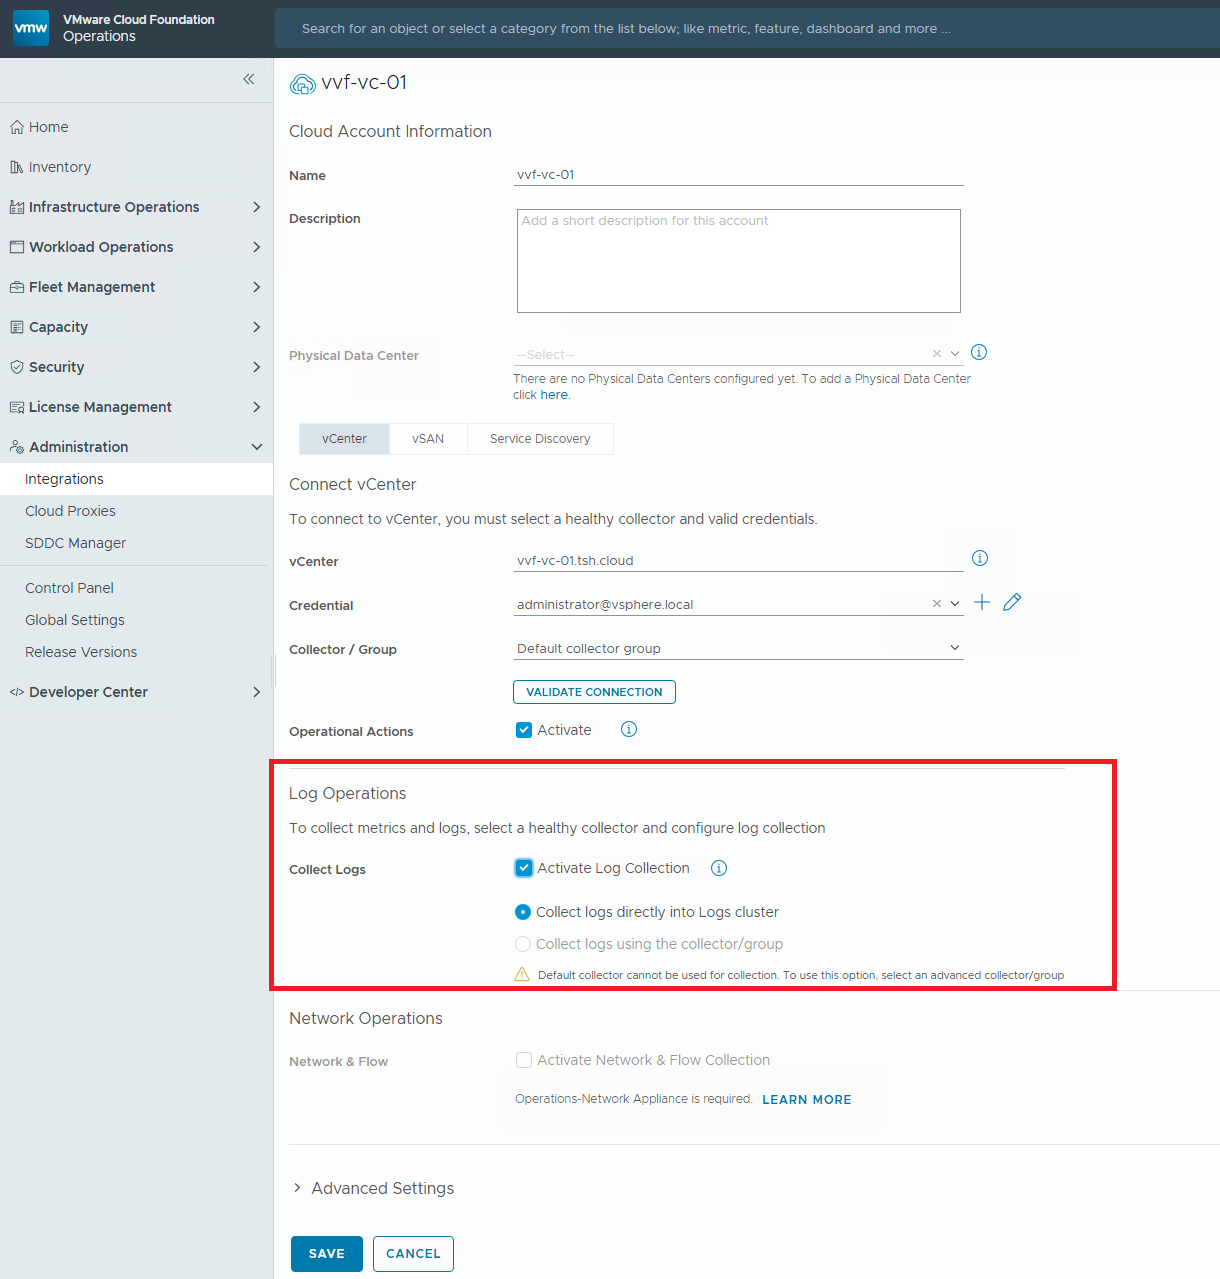
In the Integration configuration window scroll down to the Log Operations section. Choose the Activate Log Collection tick box and then make sure the Collect Logs directly into the Logs Cluster is selected. Click on Save
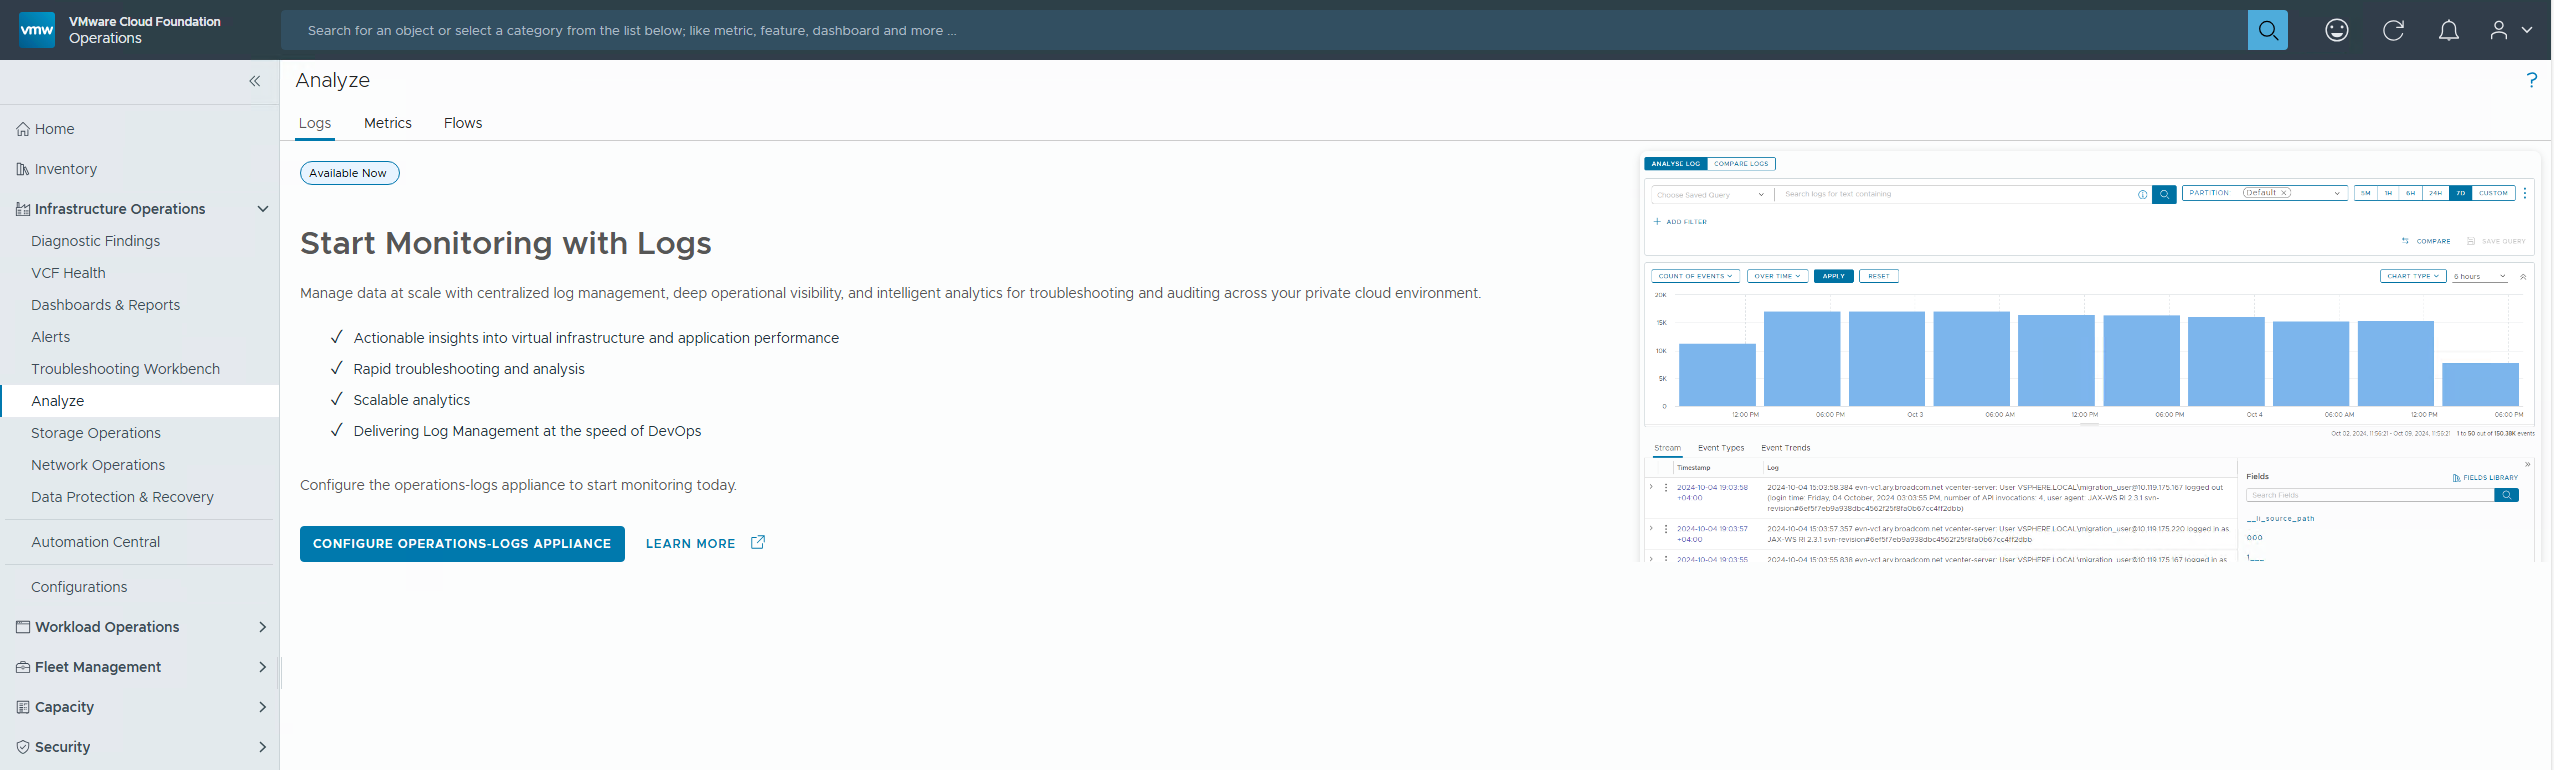
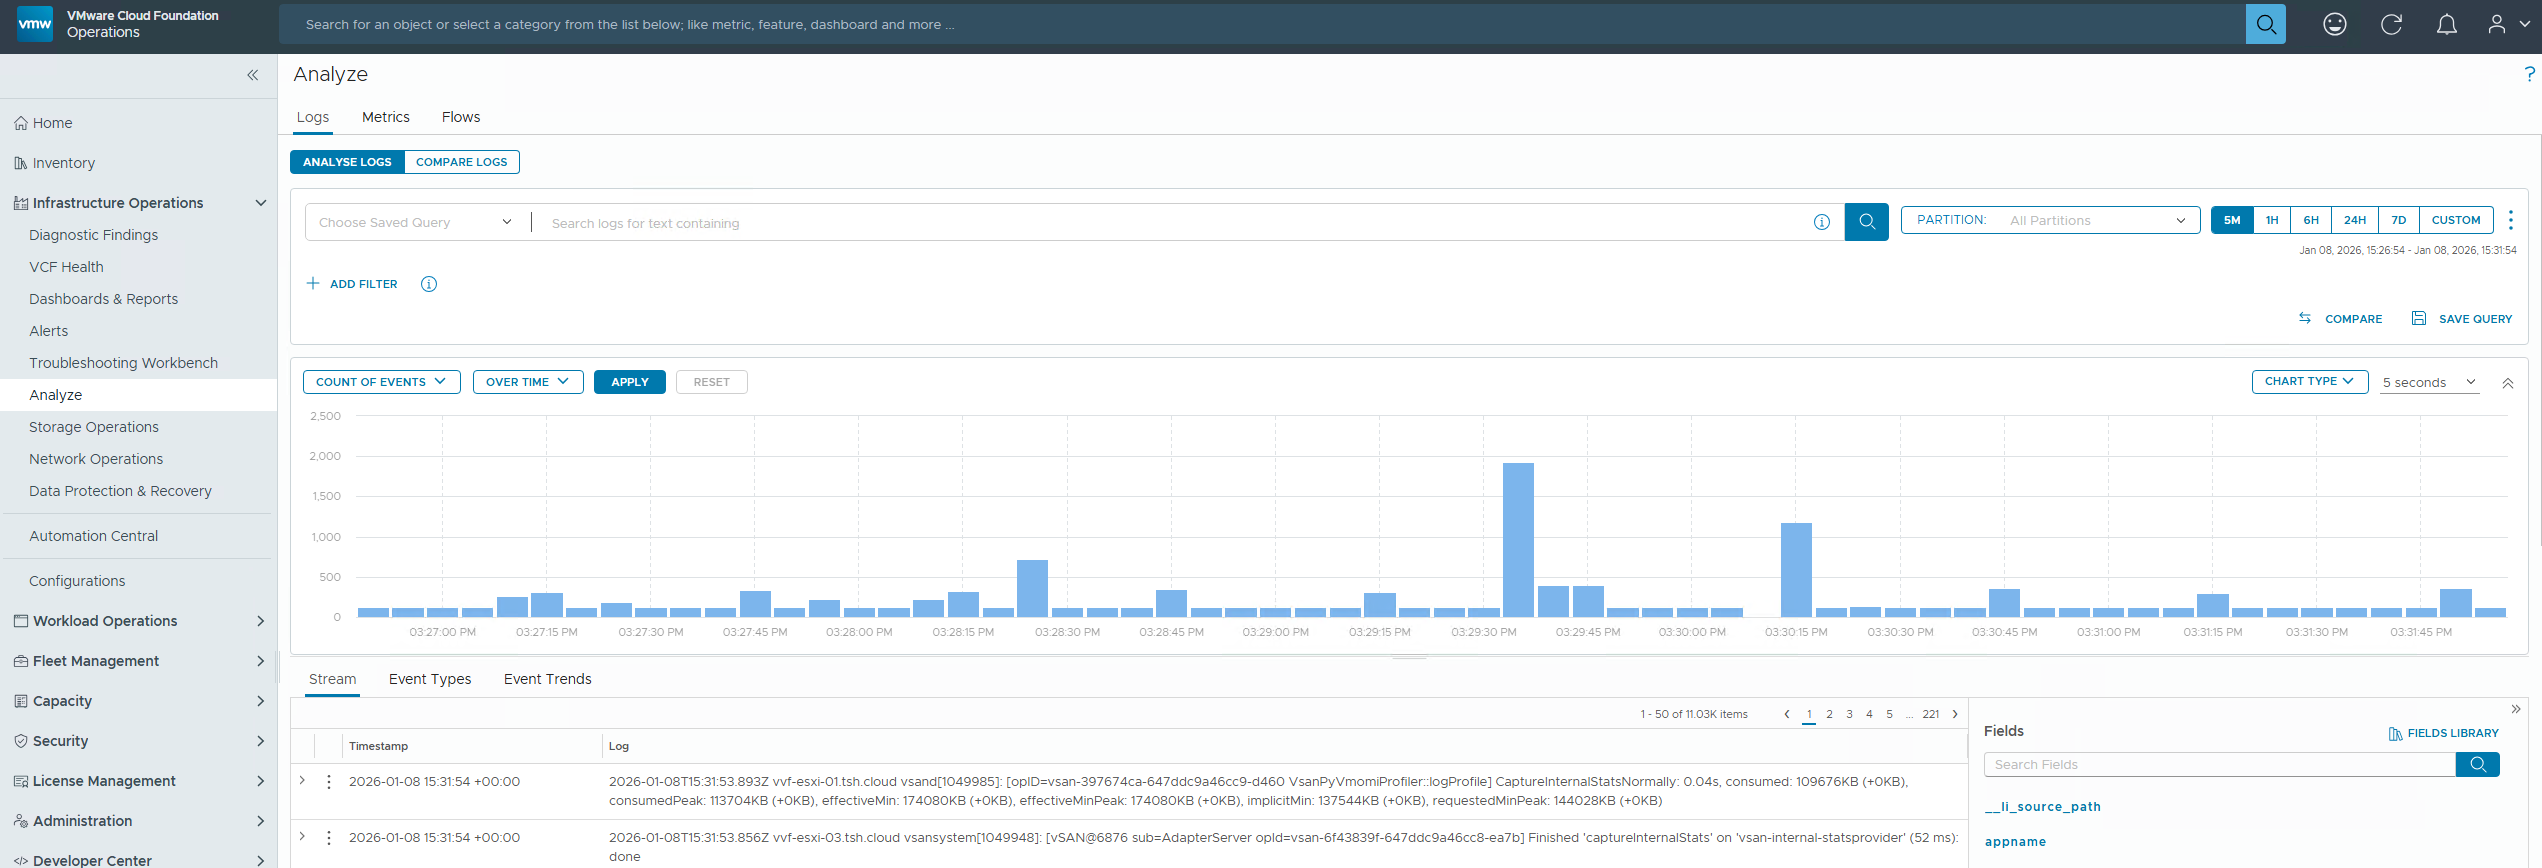
You will need to give it about 5 minutes and then you can go to the Infrastructure Operations and then Analyze section. If you do not see any data click on the search icon and it should refresh the data and you should see something like the below
Add New Host to the Cluster
Coming soon
Remove Host from the Cluster
Coming soon